DILI:A Distribution-driven Learned Index
摘要:
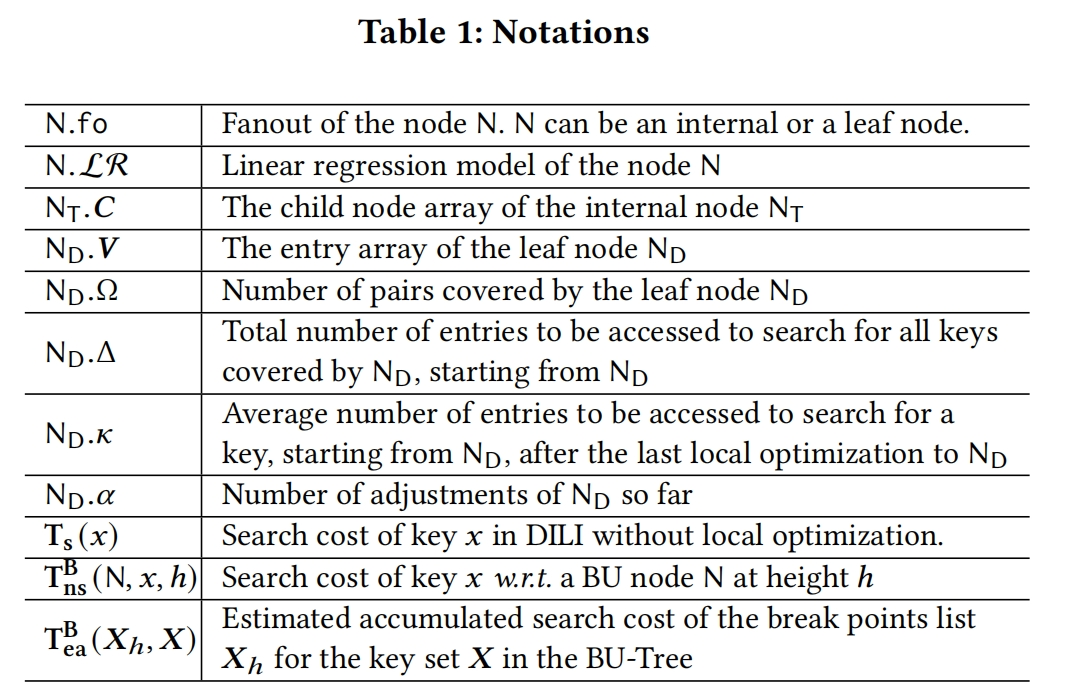
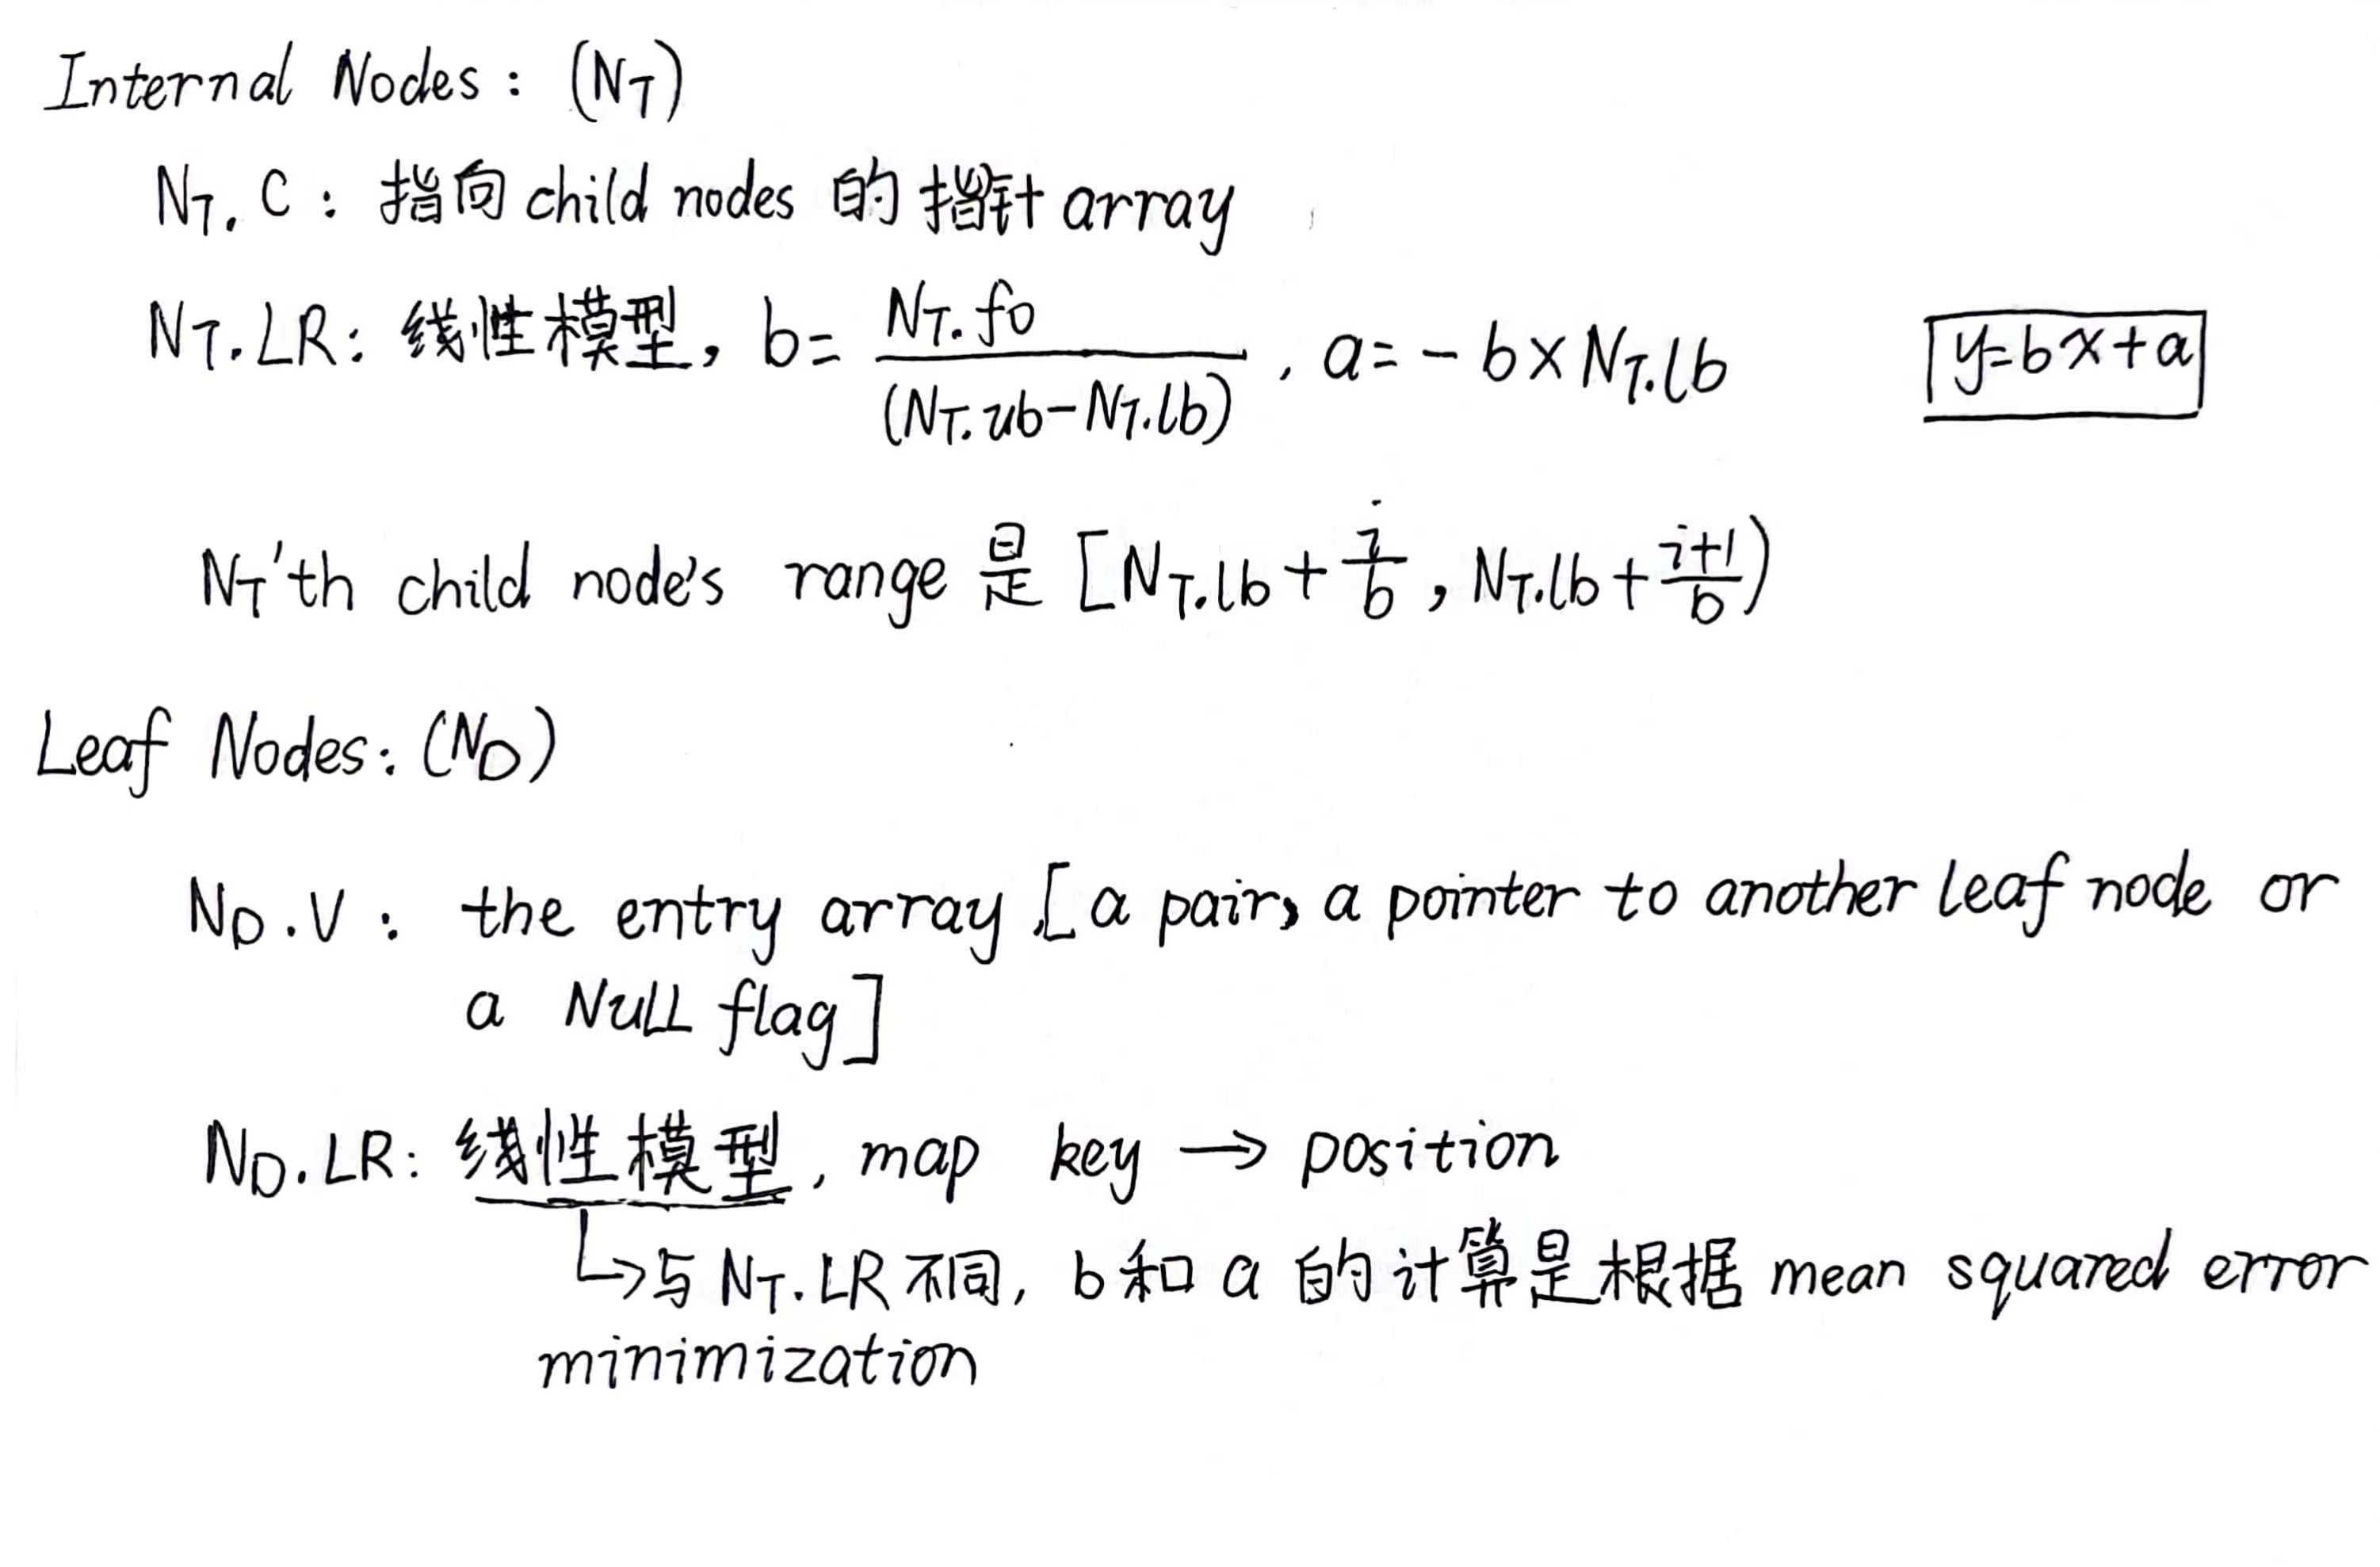
DILI的每个节点(internal node 和 leaf node)都有一个Linear model,并且internal node的key’s range被它的child node均分,当进行key查找时,可以准确地找到对应的leaf node。在leaf node中的linear model是可以准确预测key的位置的。
为了构建DILI,首先构建一颗bottom-up tree,然后使用这个bottom-up tree,自顶向下构建一个DILI树。DILI在the number of leaf nodes和tree height之间有一个很好的平衡(the number of leaf nodes 和 tree height是影响key搜索时间的关键因素)。设计了灵活的插入和删除算法,并在必要时调整树形结构。
实验结果表明DILI比其它baseline在不同的workloads上要表现的更好。
1.INTRODUCTION
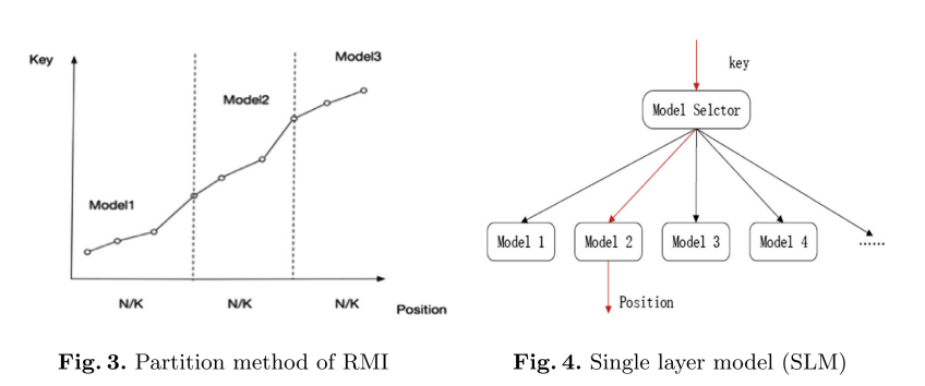
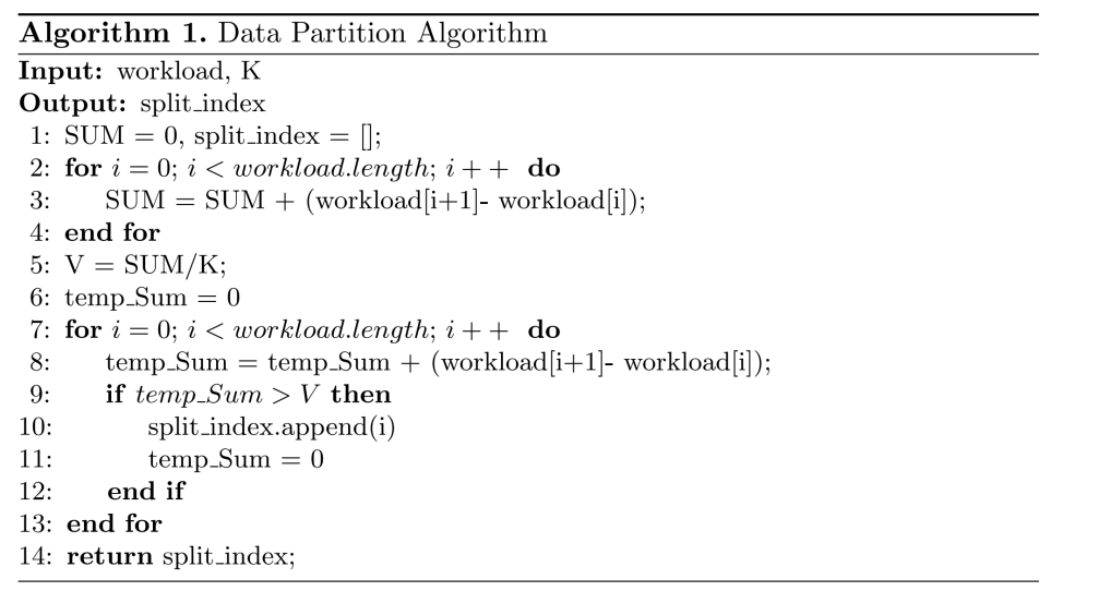
RMI:仅支持查找
ALEX:扩展RMI,在leaf node中使用 gapped array,使用 cost model初始化RMI结构和动态更新RMI结构。存在last-mile问题
LIPP:解决last-mile问题,但是没有利用data distribution
DILI-LO:未解决last-mile问题,利用data distribution
DILI:解决last-mile问题,利用data distribution
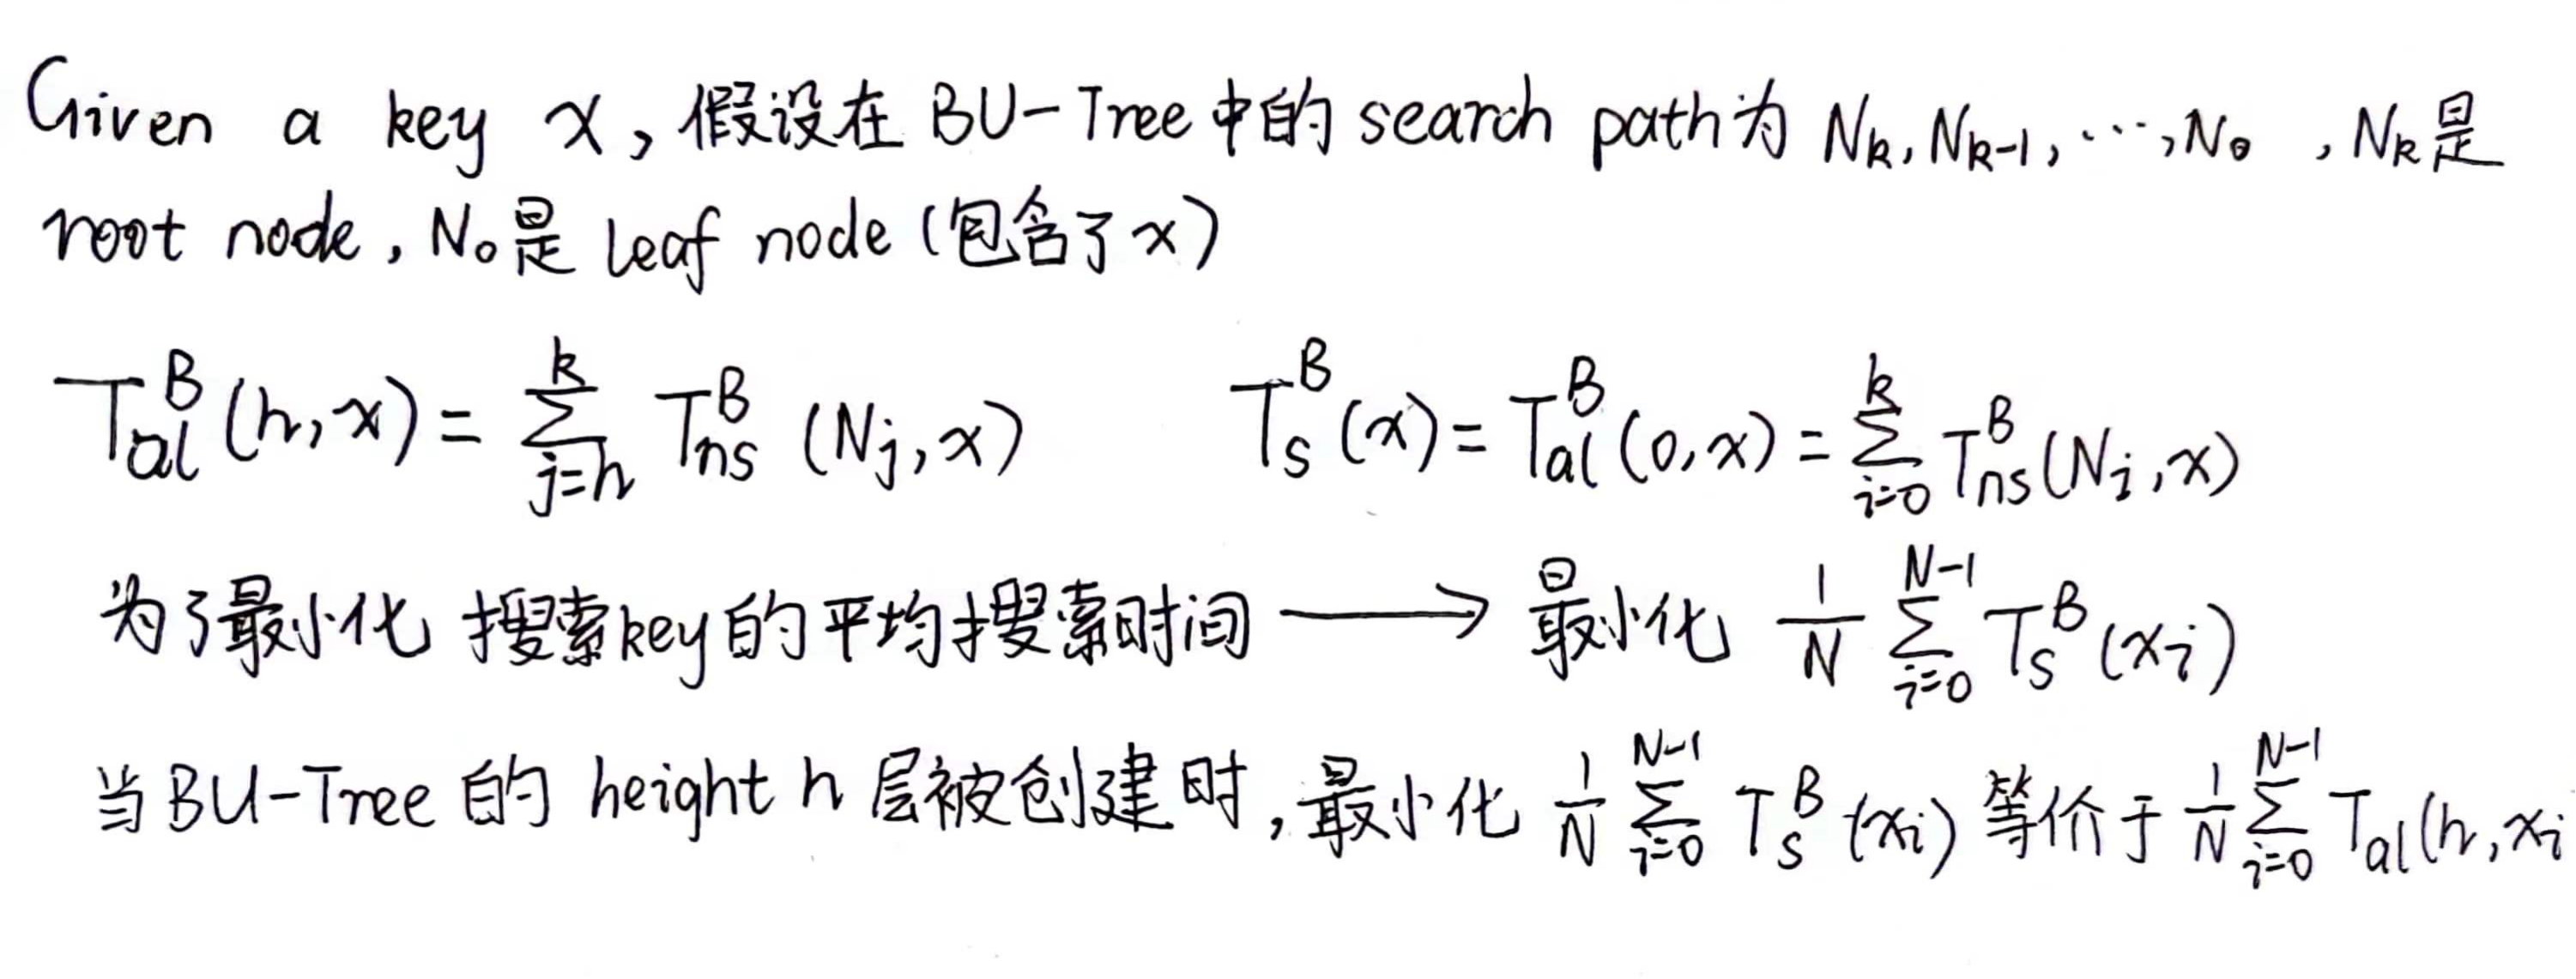
构建DILI的目的是实现最好的搜索性能 —> 搜索的开销取决于(1)leaf node的深度(2)leaf node中的linear model预测的accuracy —> 这两个factors都应该在DILI的构建中被考虑
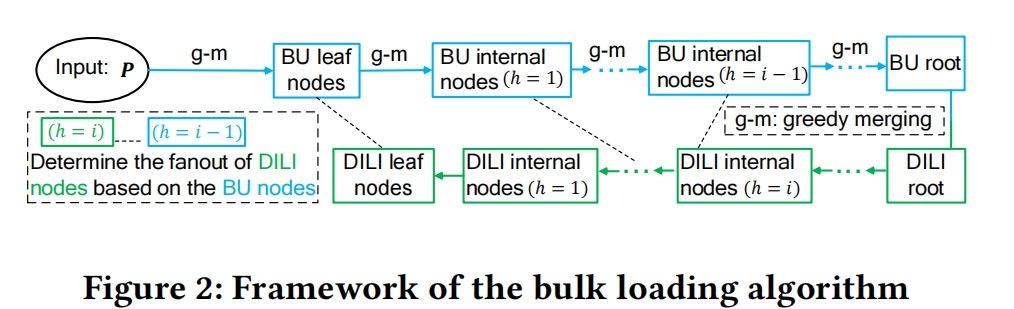
因此,提出了一个two-phase bulk loading 方法
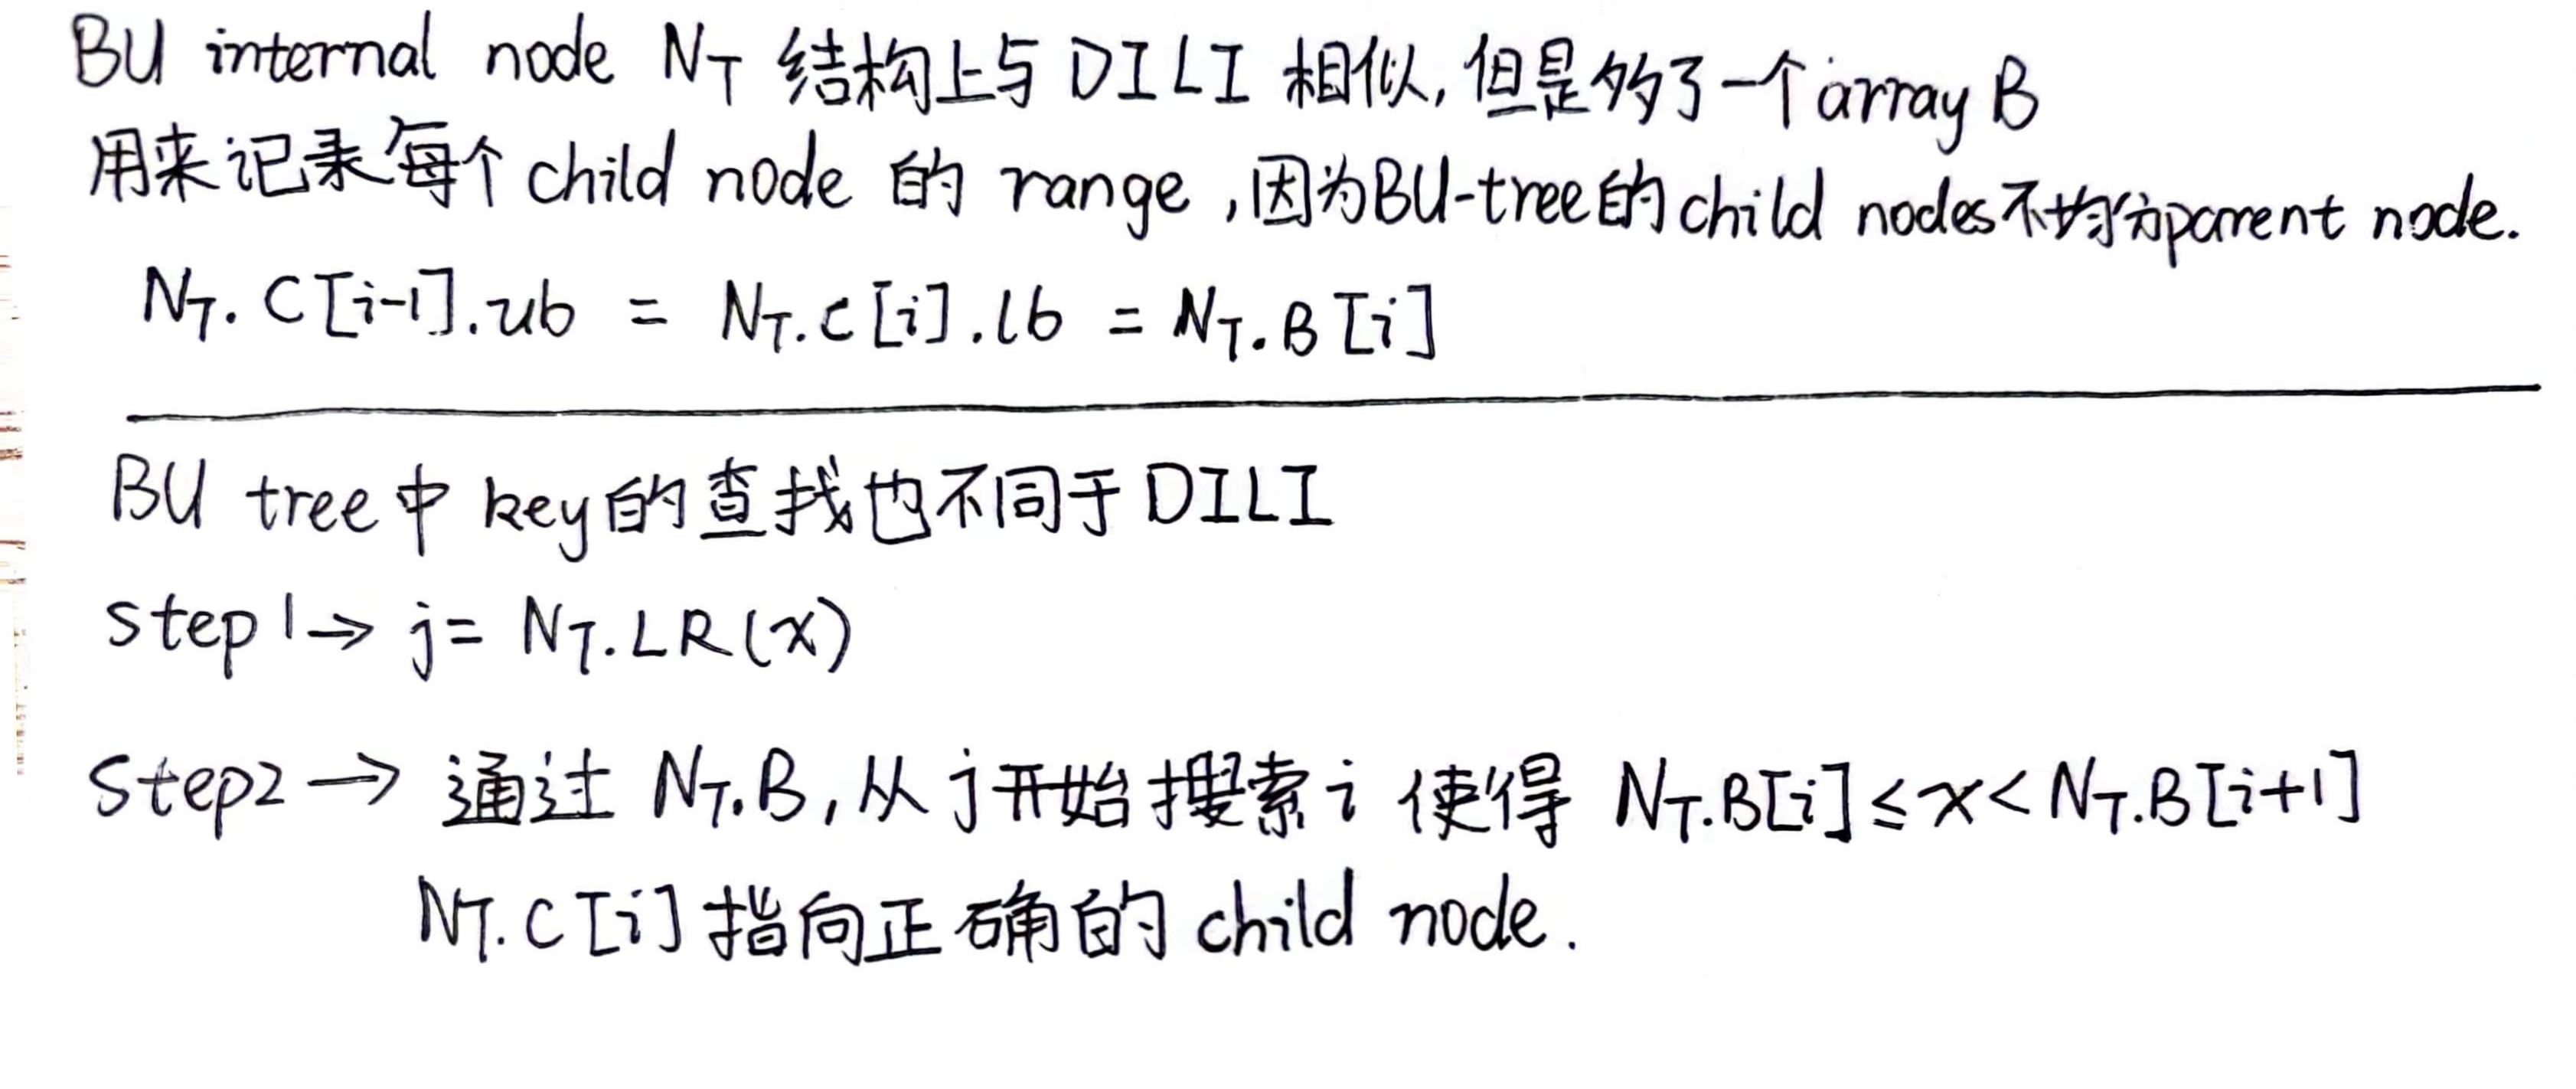
Phase1 -> 使用greedy merging algorithm(考虑到了上面的两个factors) 构建一棵BU-tree(BU-tree的internal node’srange并不是被它的child nodes均分的,因此在BU-tree进行key搜索时,确定child node需要额外的开销)
Phase2 -> 借鉴BU-tree的结构构建DILI
Contribution
- 提出DILI,algorithms 和它的cost analysis
- 构建DILI的two-phase bulk loading 方法
- 对DILI的leaf node的local optimization,解决last-mile问题
- 对于DILI的insertion和deletion操作提出相应的algorithm来维持查找性能
- 在synthetic data和real data上证实DILI的性能
2.OVERVIEW OF DILI
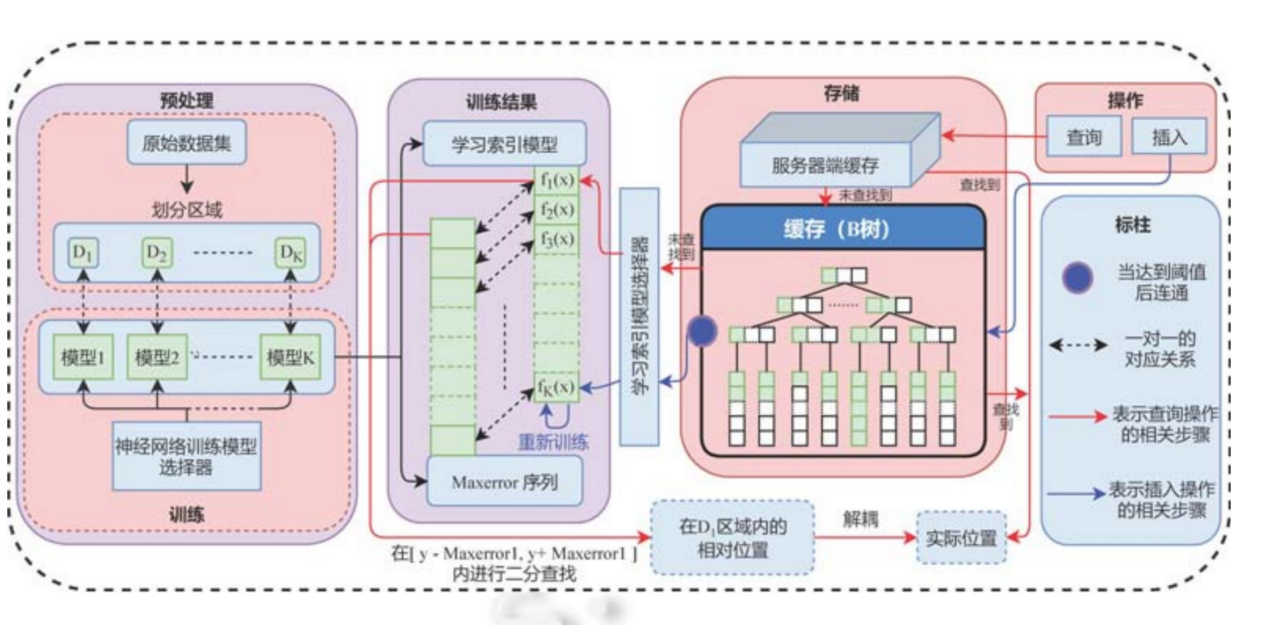
DILI的结构如Figure 1所示
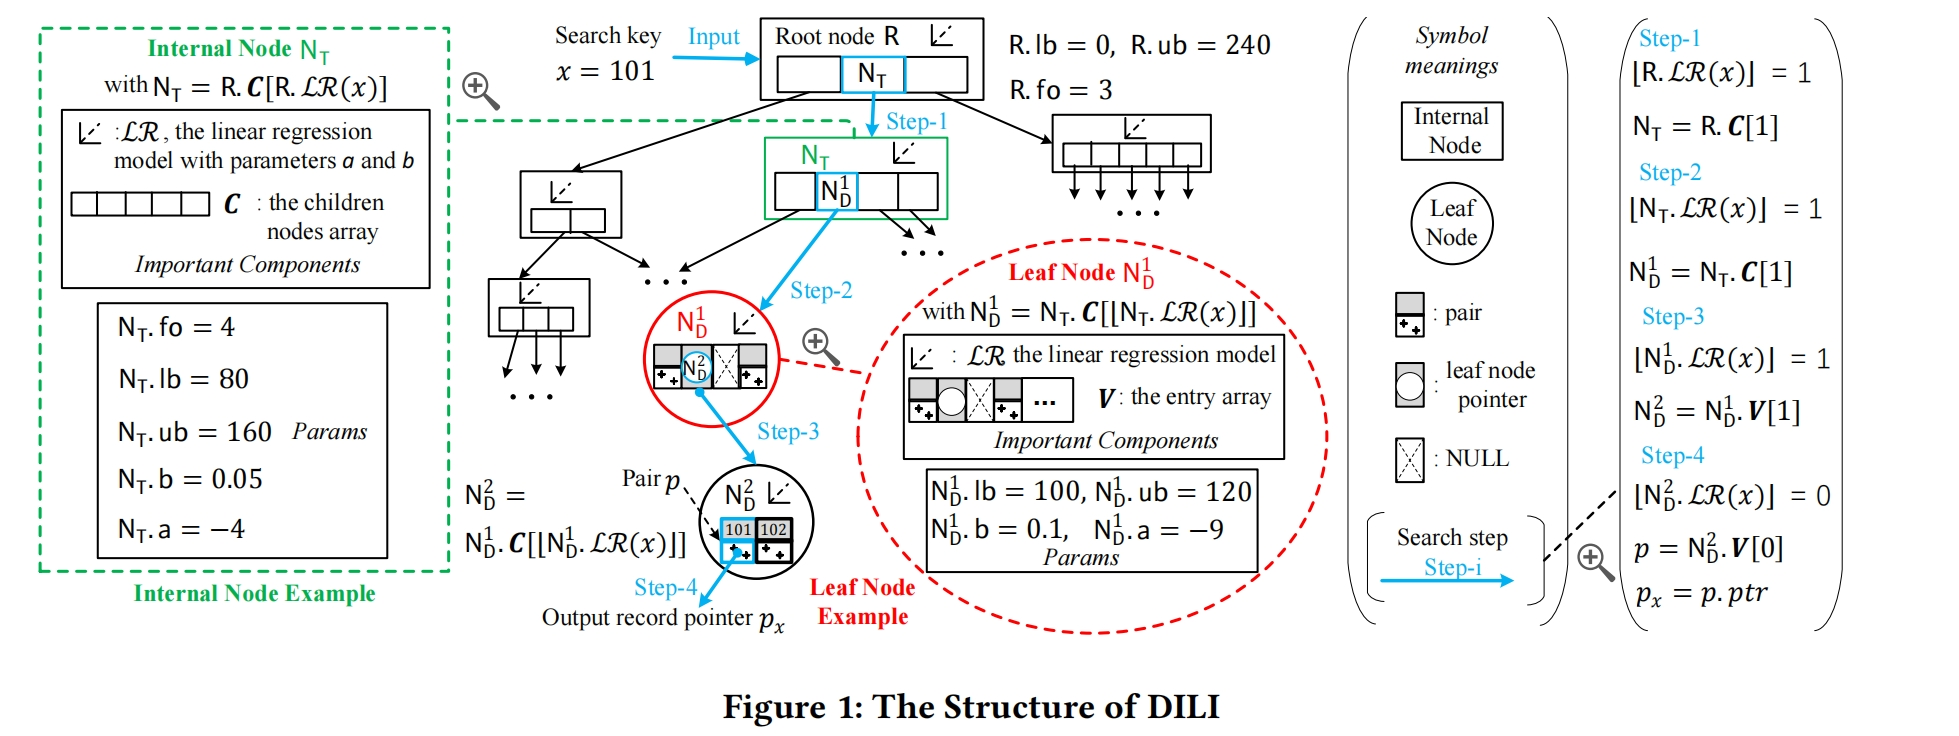
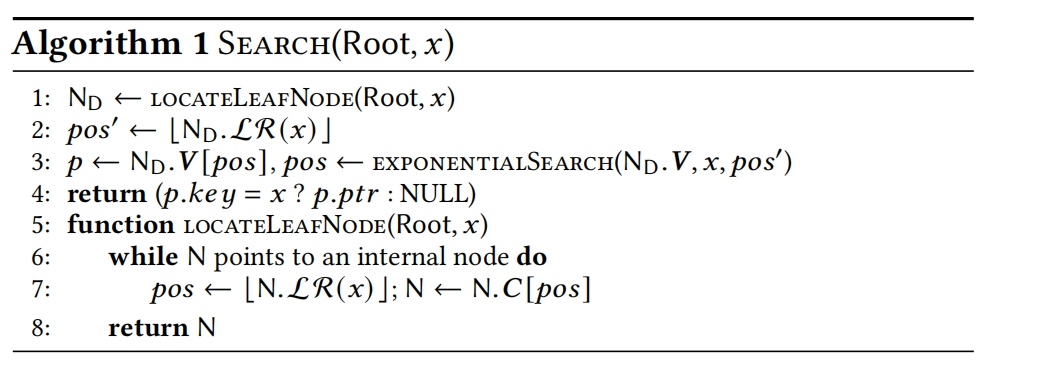
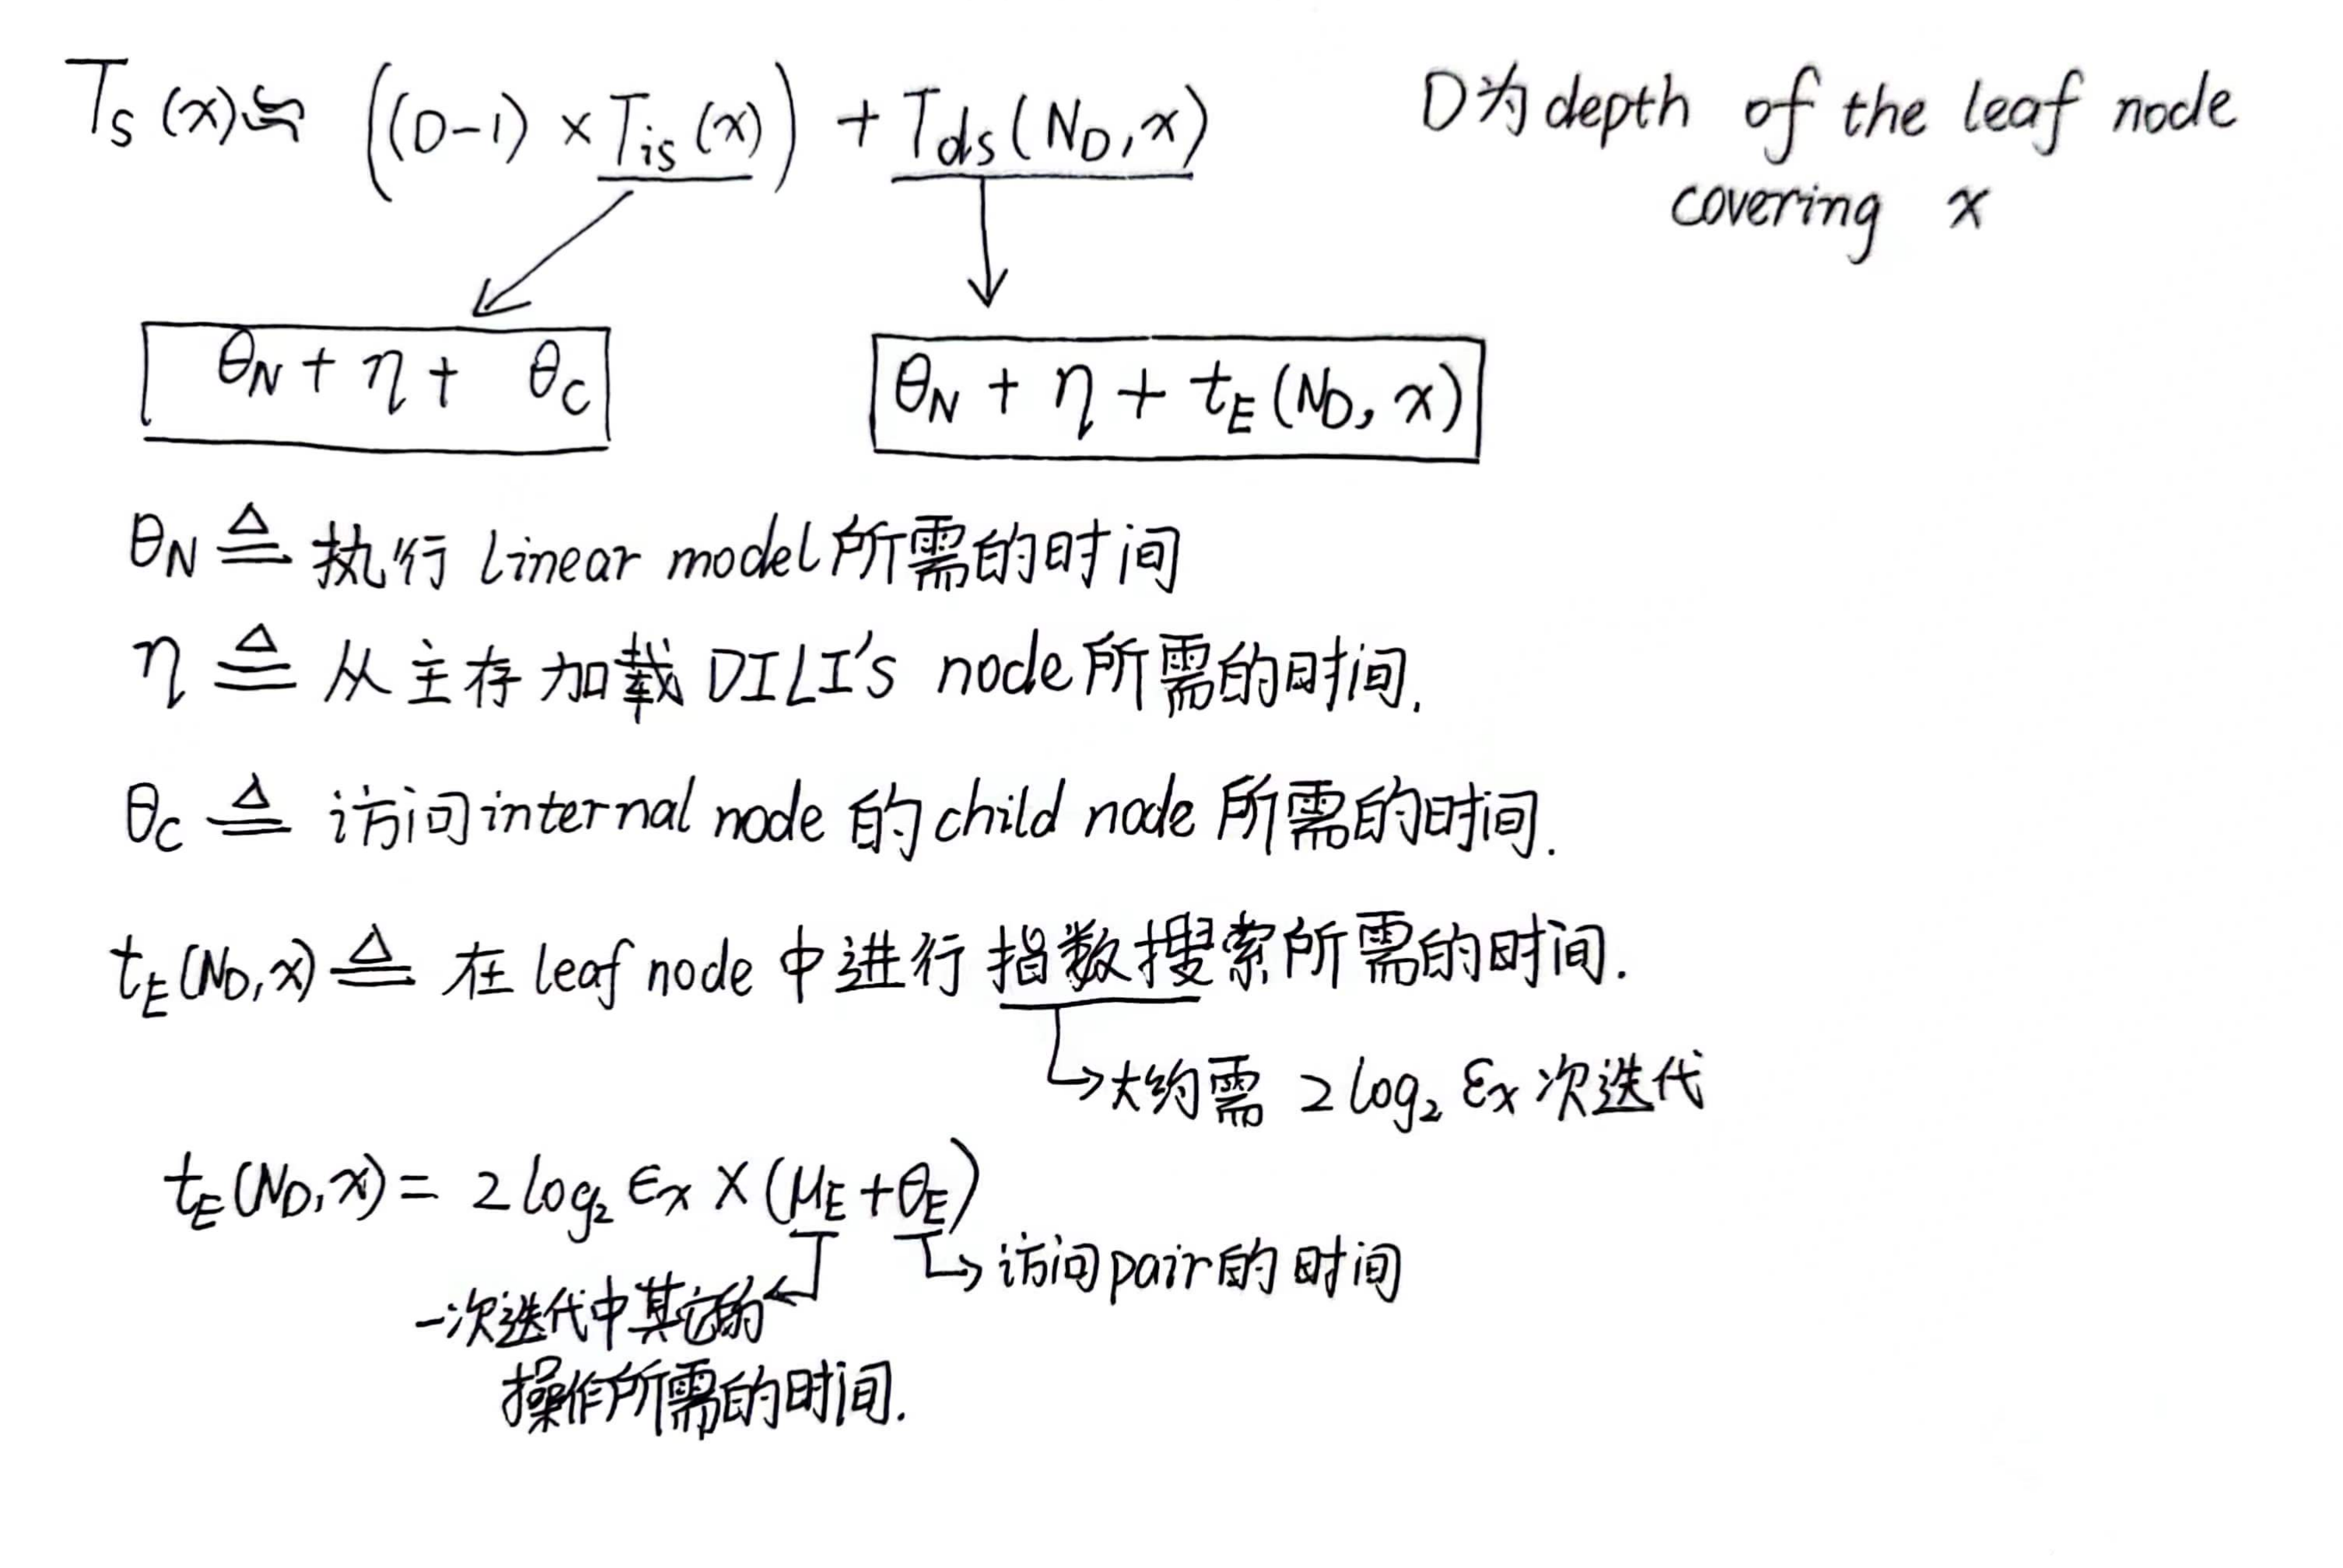
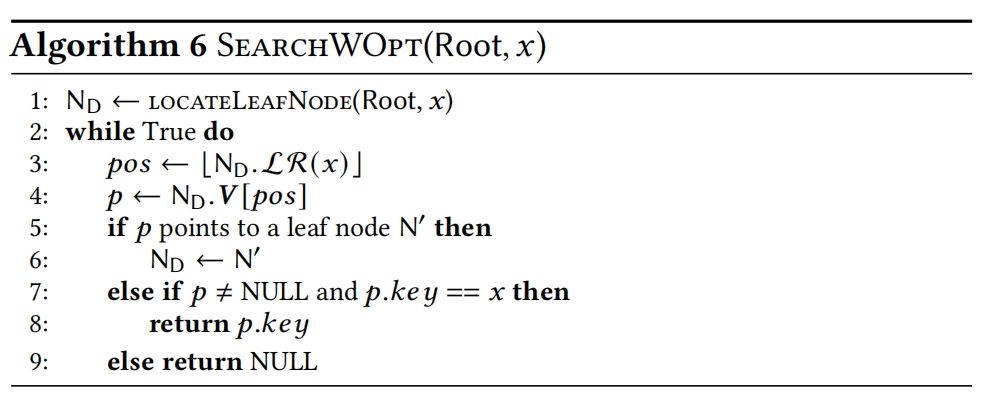
DILI在没有使用local Optimization的时候SEARCH算法如下,查找key时,锁定了leaf node后需要再进行指数查找来确定position。
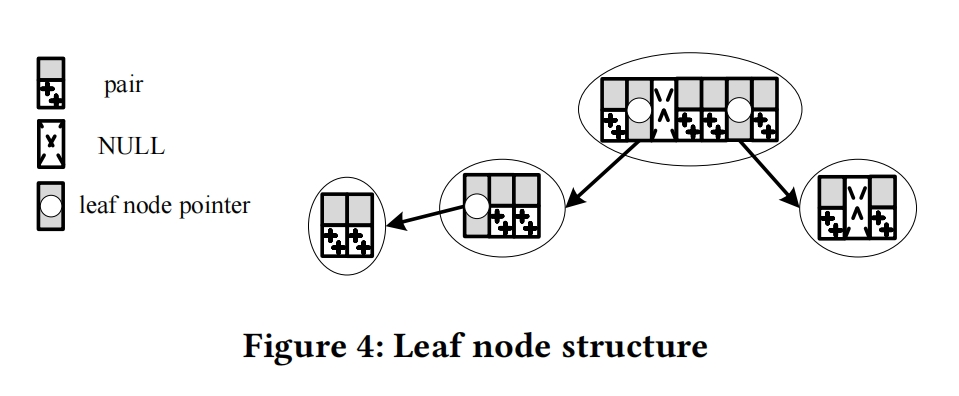
Local Optimization strategy
在leaf node中,先用线性模型预测key的position,之后直接将key放到预测的position上,如果发生冲突,就创建一个新的node,对应的entry设置为指向新node的指针
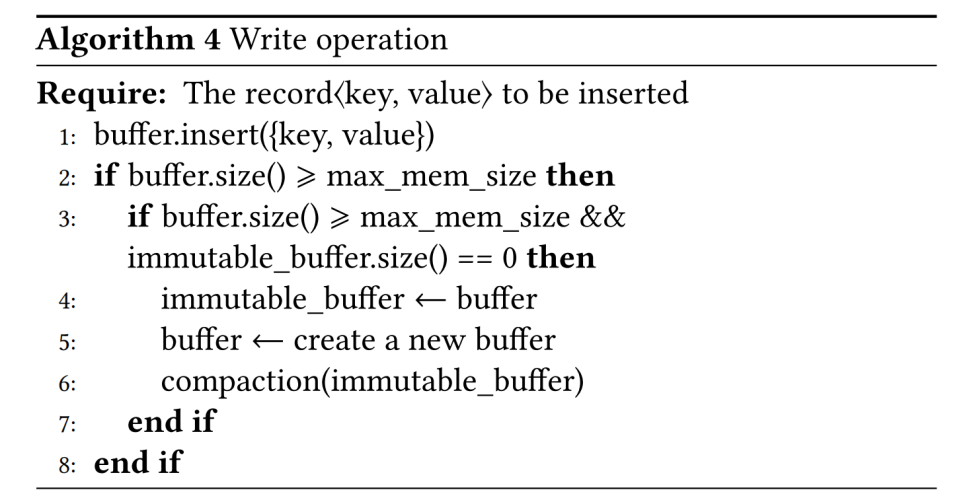
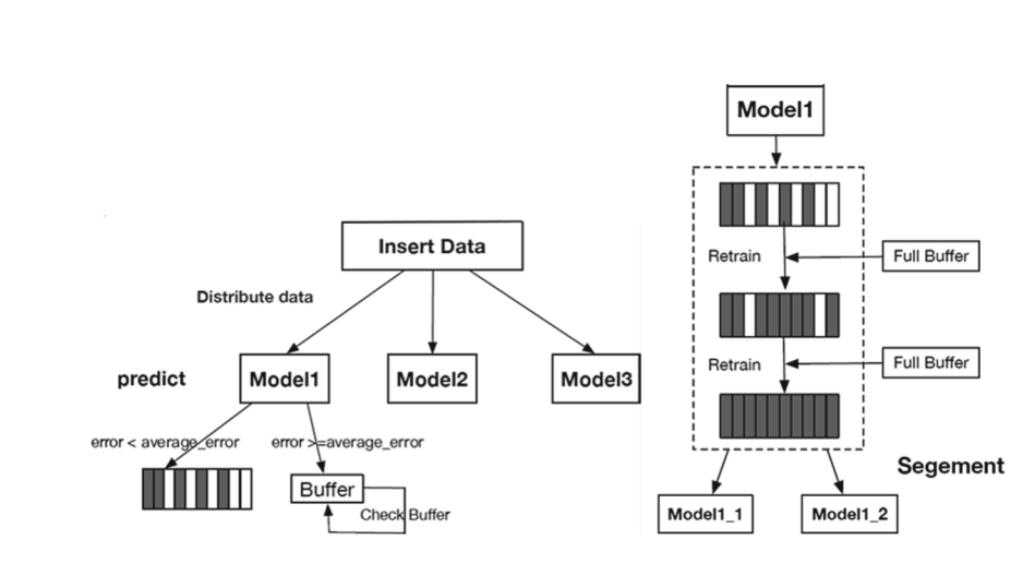
Updates
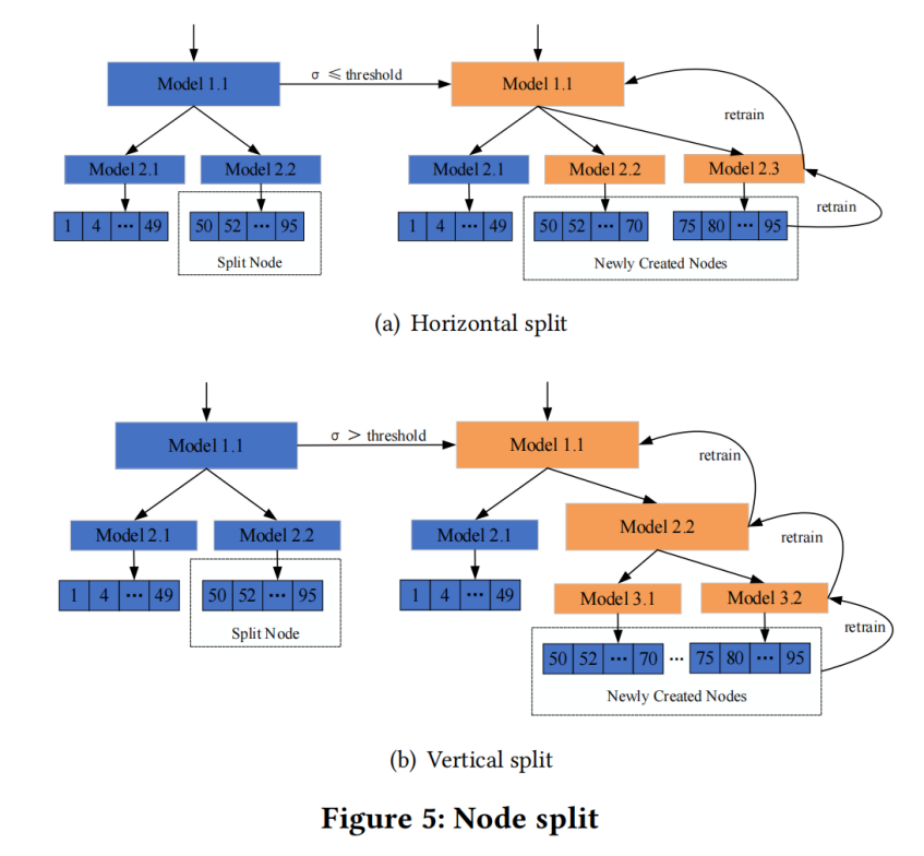
当对DILI插入数据时,如果发生conflict,会创建新的Node,当创建的新Node过多并且退化了查找性能时,需要进行调整策略(在section6会详细描述)
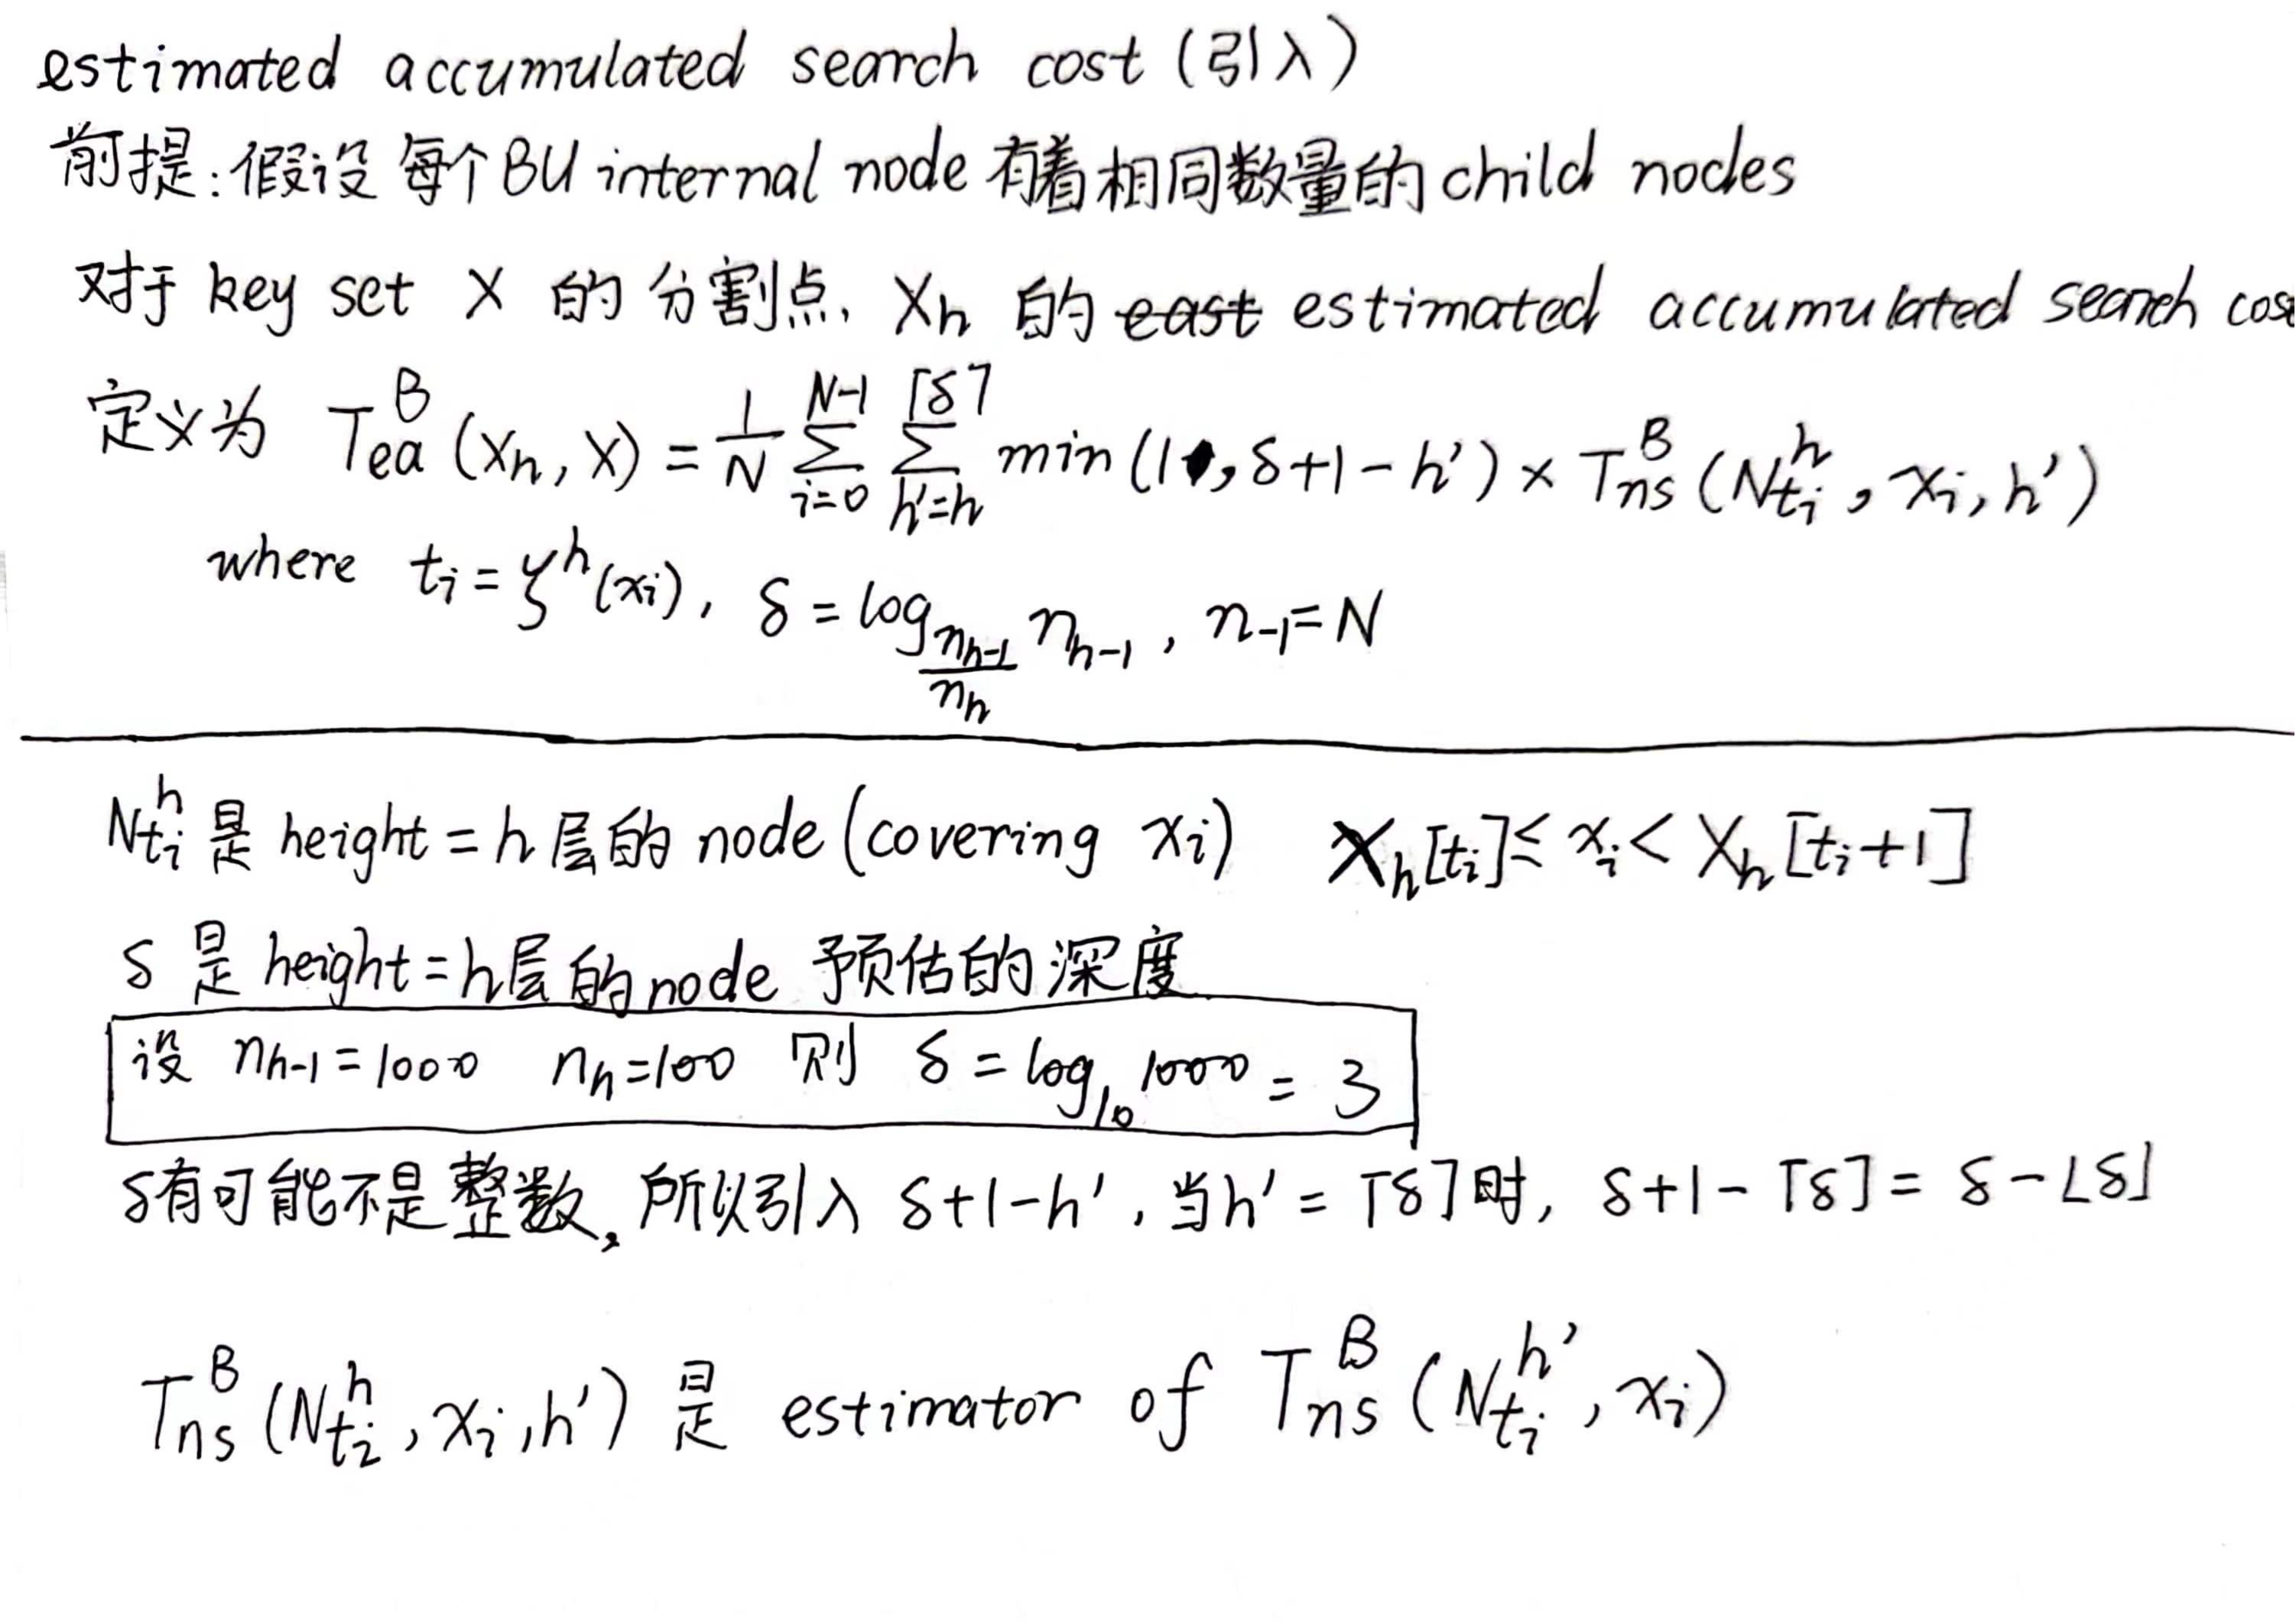
3.SEARCH COST ANALYSIS
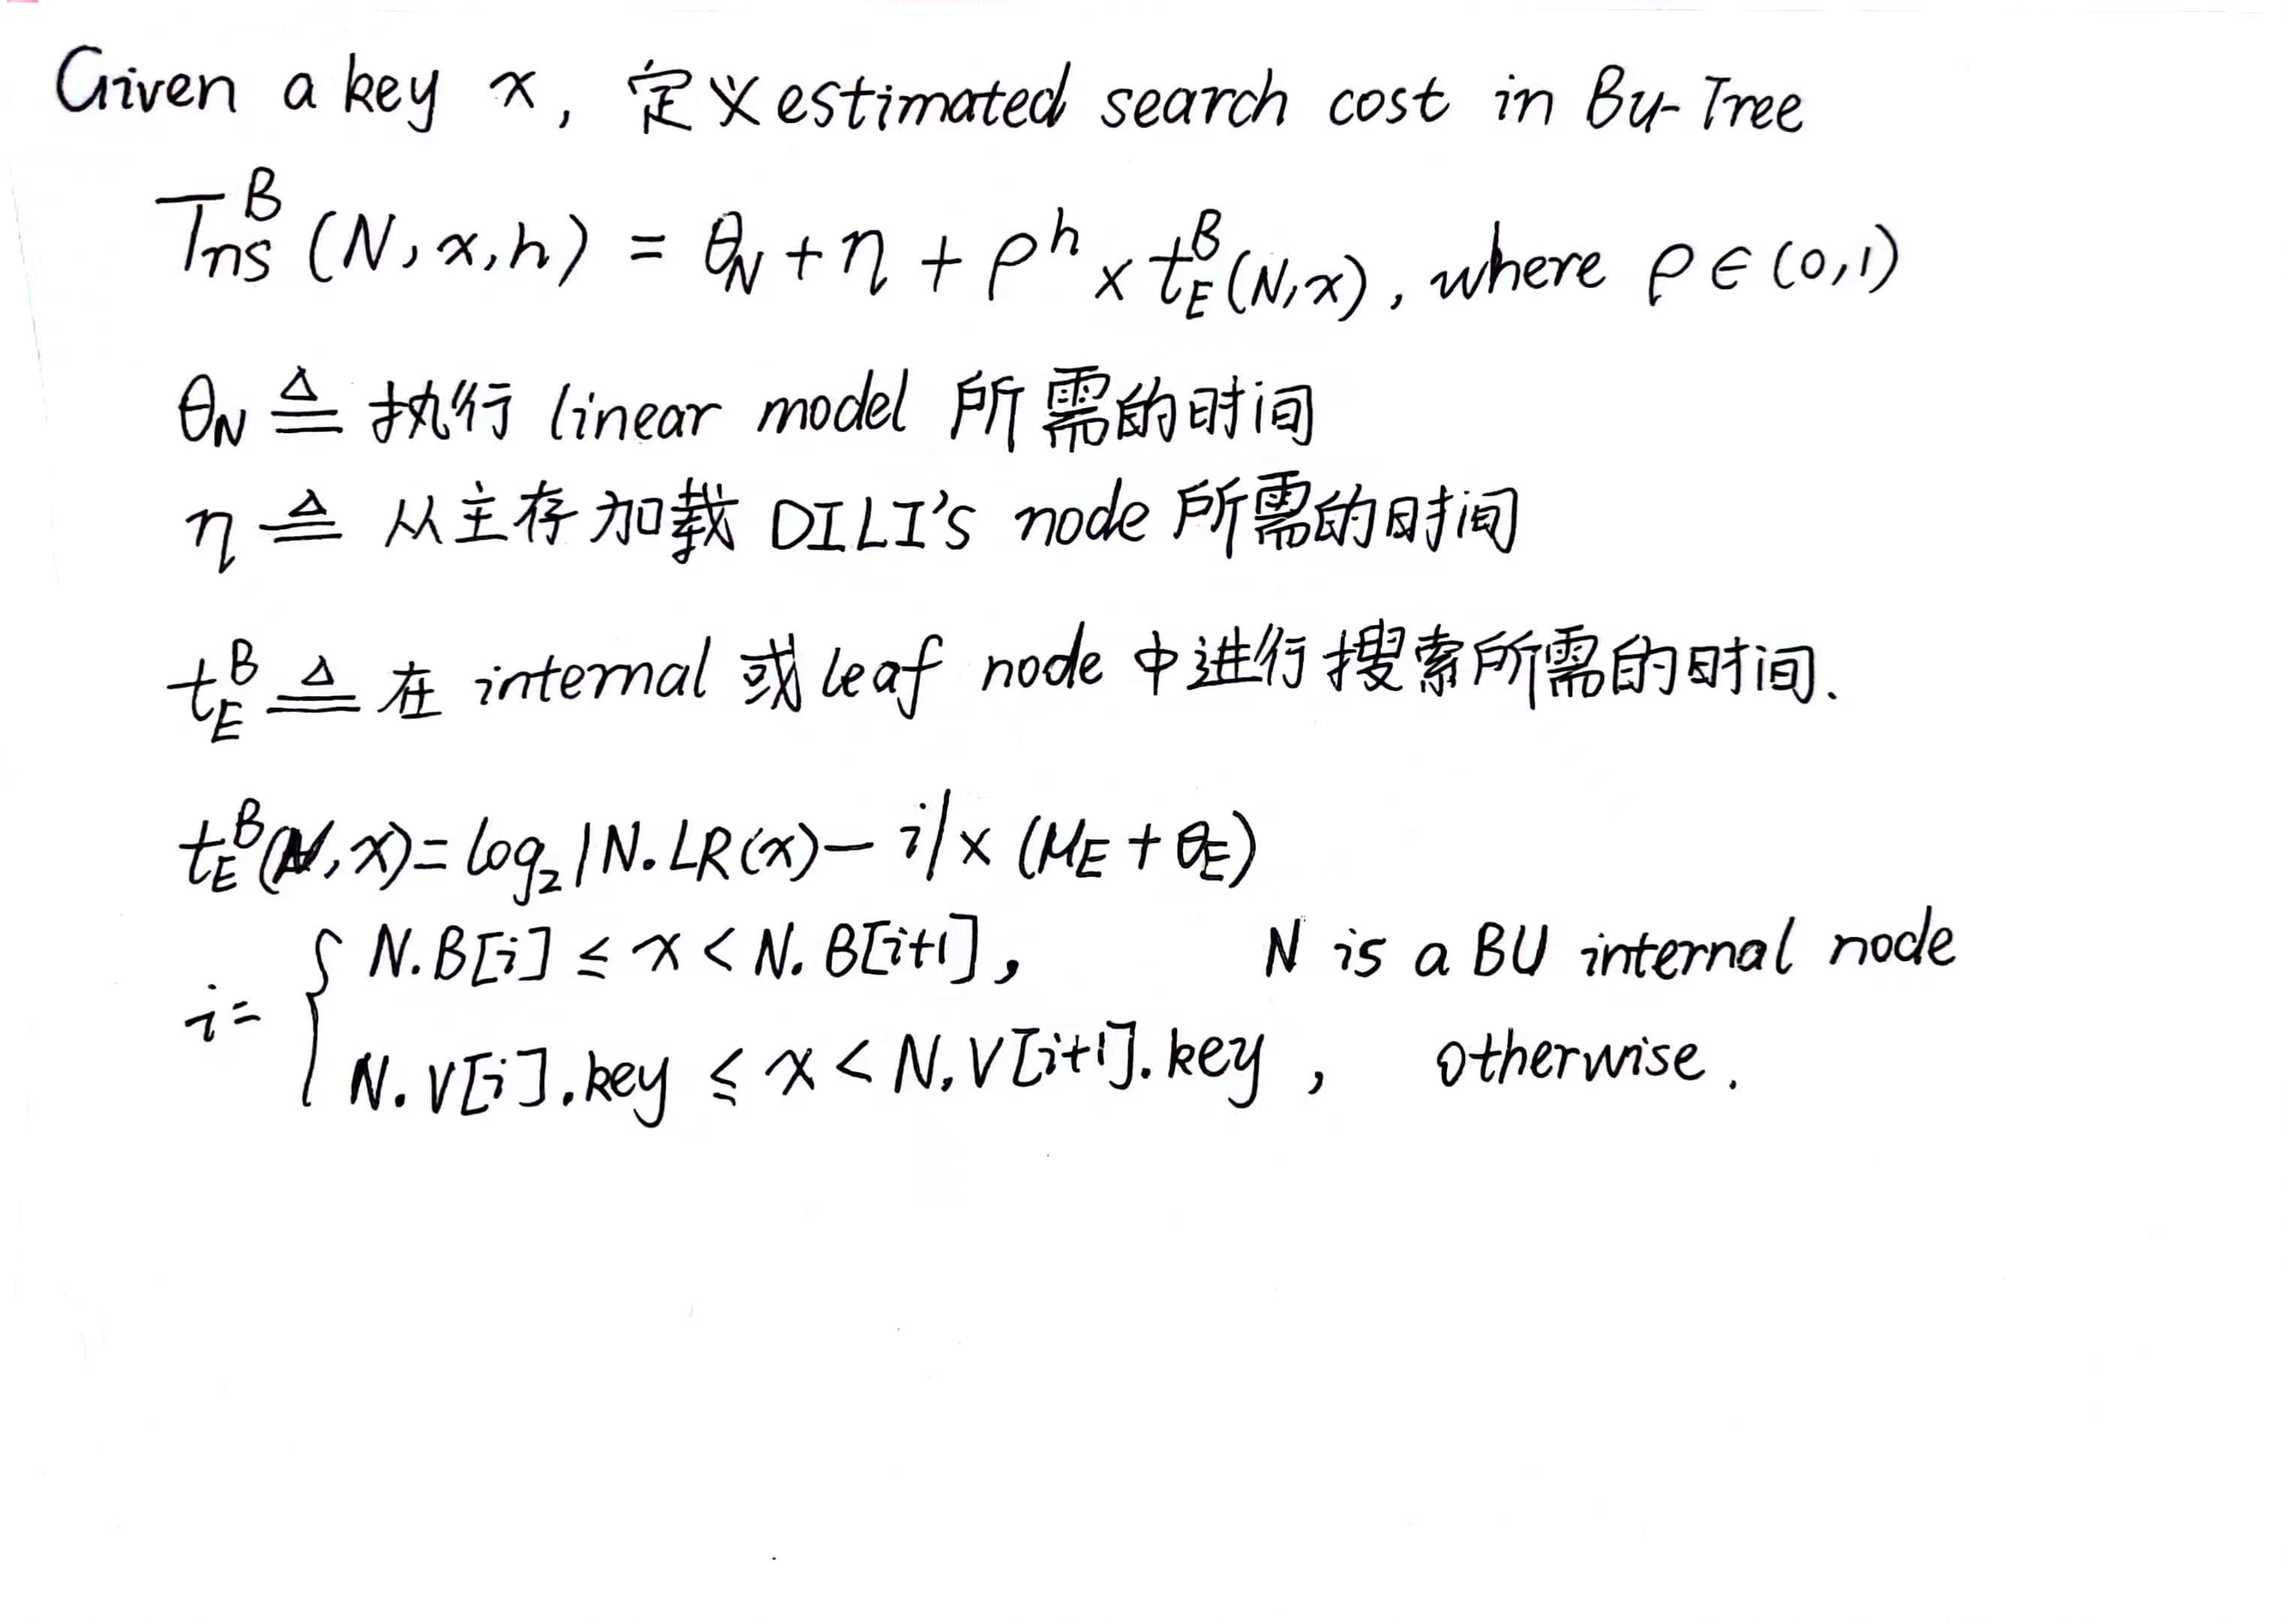
Cost Analysis:
未使用local optimization strategy
Algorithm1由两步组成(1)找到包含search key的leaf node (2)leaf node中的local search
4.CONSTRUCTION OF DILI
4.1Motivation and Overall Idea of BU-Tree
DILI的internal node的线性模型有着完美的准确性,因为internal node被它的child nodes均分。—-> 现在有一个问题,如何确定DILI的fanout
大致思路:
4.2 Building BU-Tree
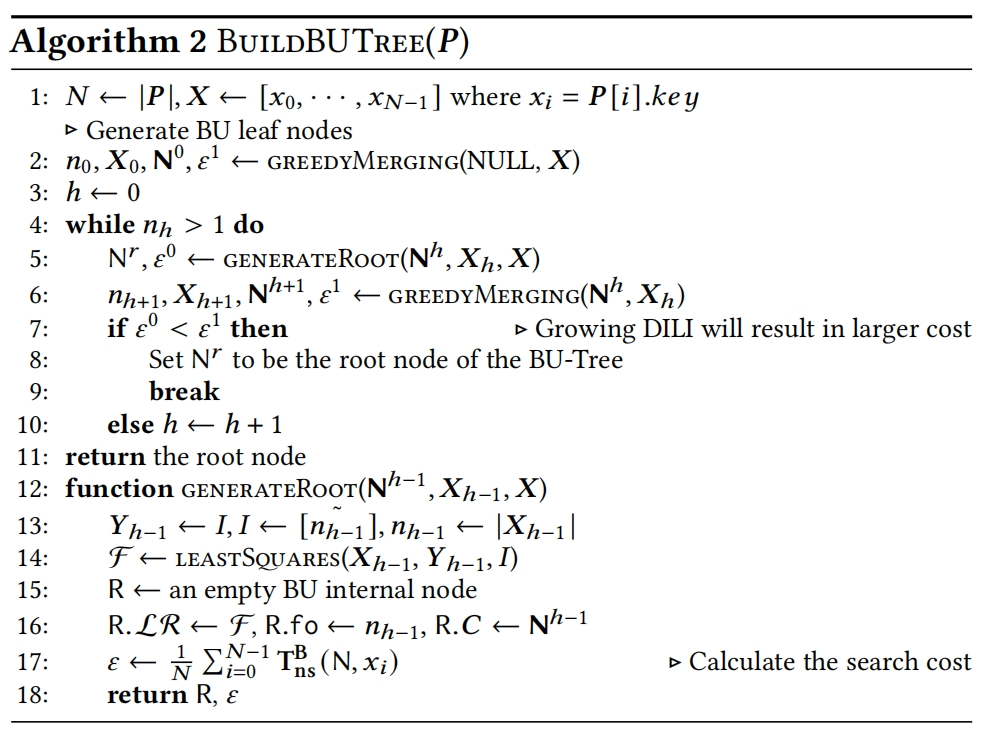
4.2.1 Bottom-up Node and Model Creation
构建第0层的leaf node
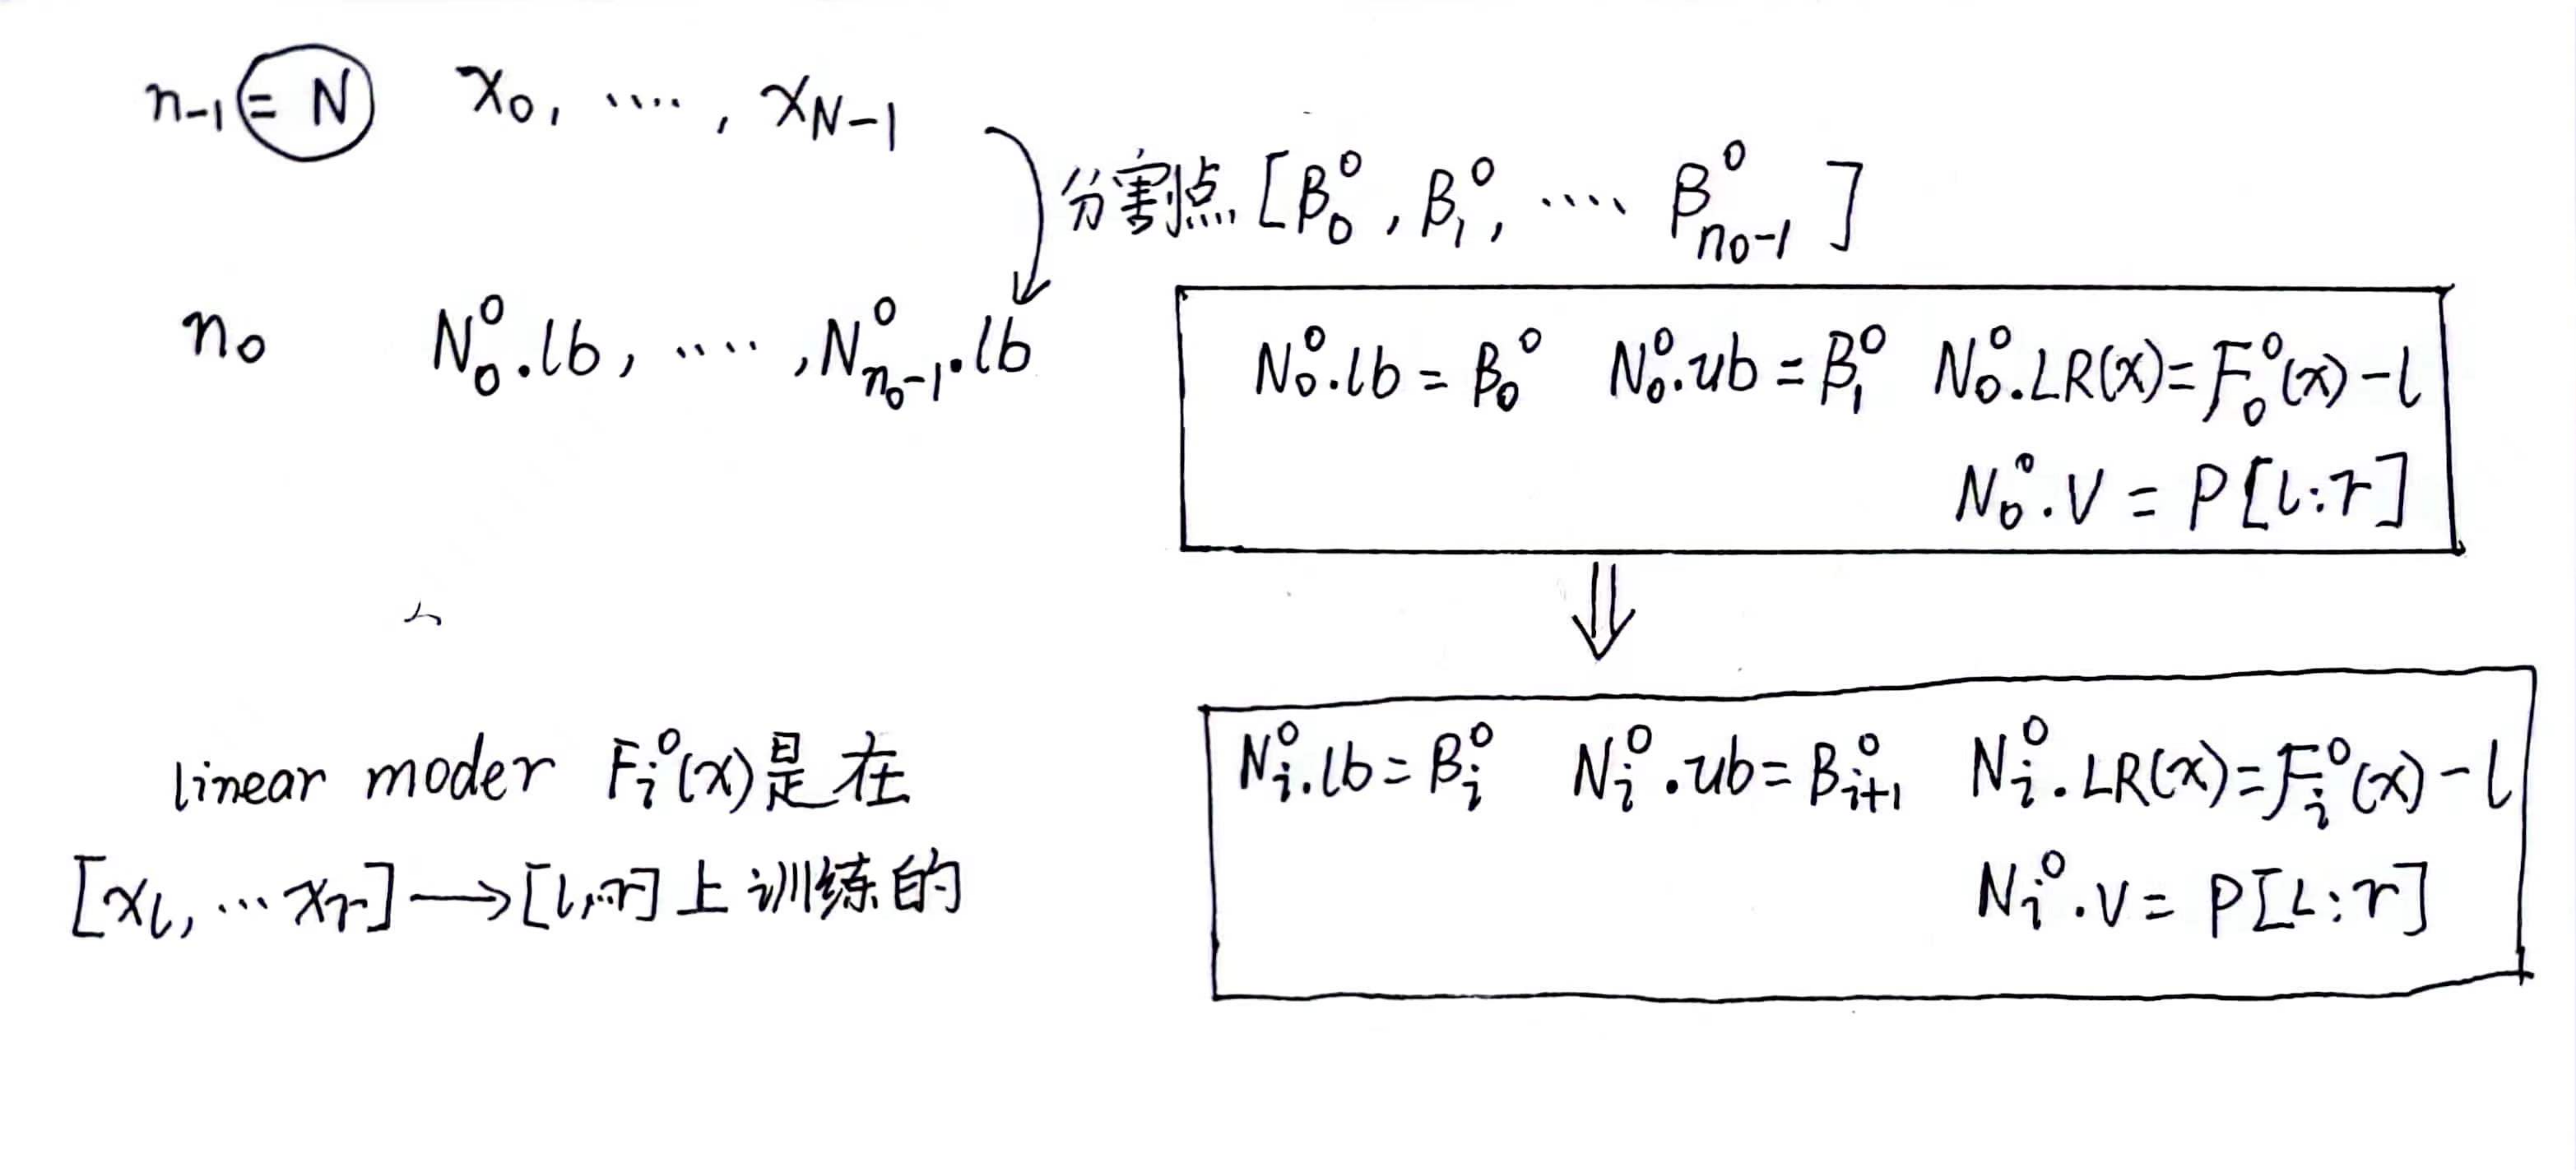
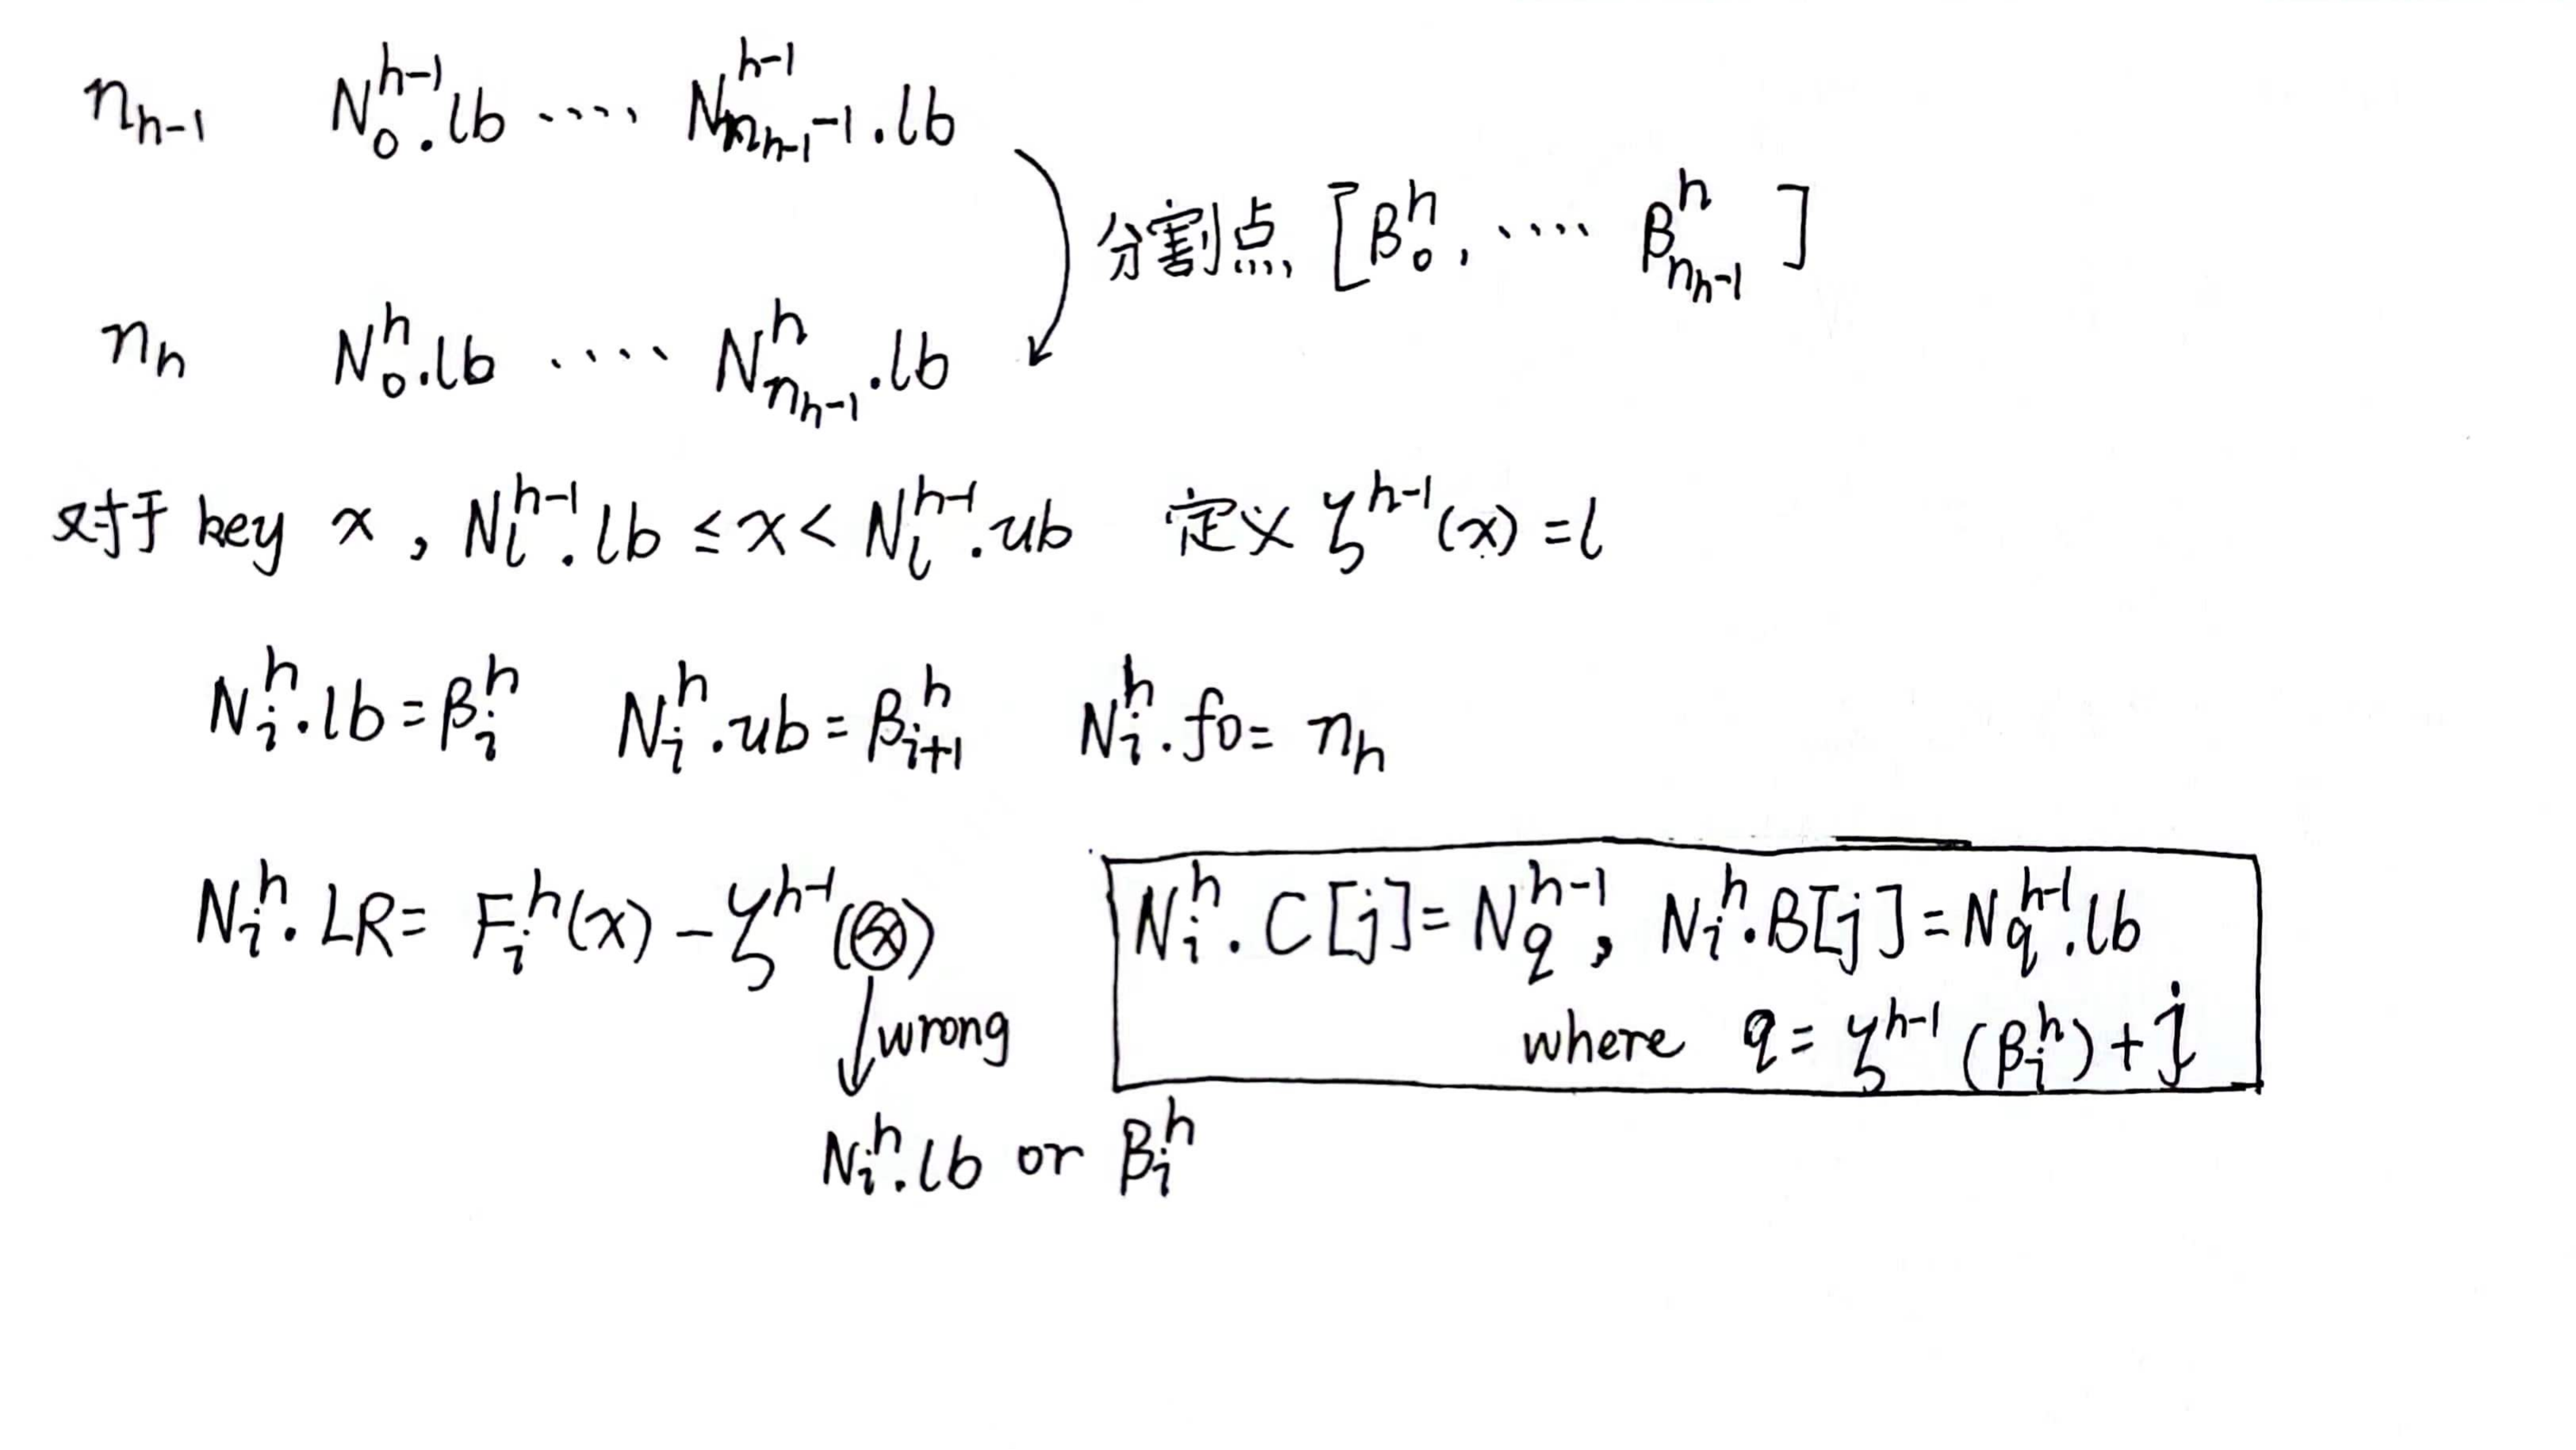
已知h - 1层的internal node,构建第h层的internal node
4.2.2 Determining Node Layout at A Height
但是BU-Tree是从下往上创建的,即使创建了第h层的node,我们也不知道BU-Tree的高度

4.3 BU-Tree based Bulk loading for DILI
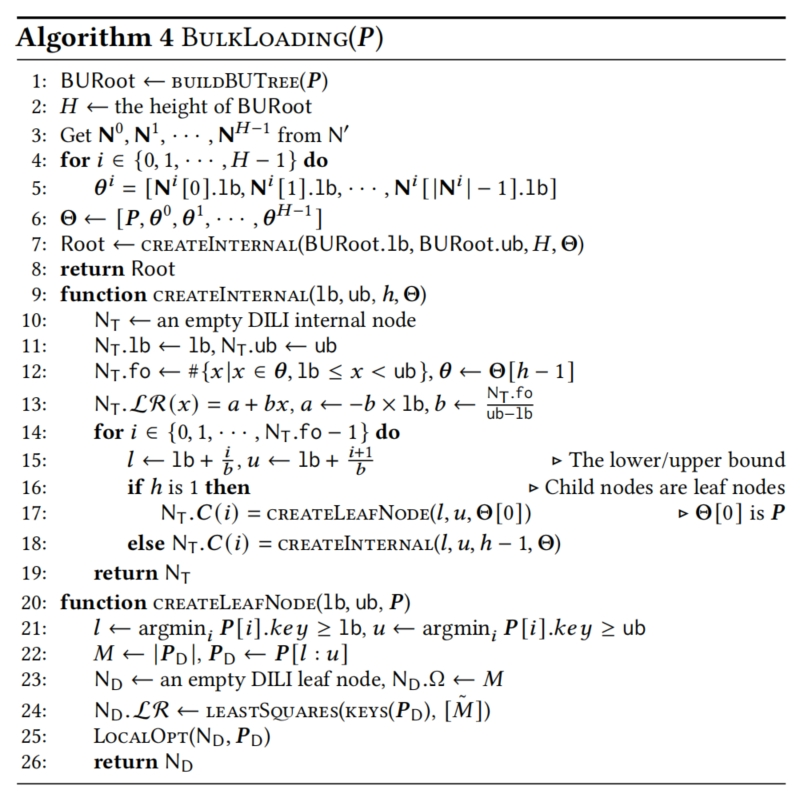
Skip ……
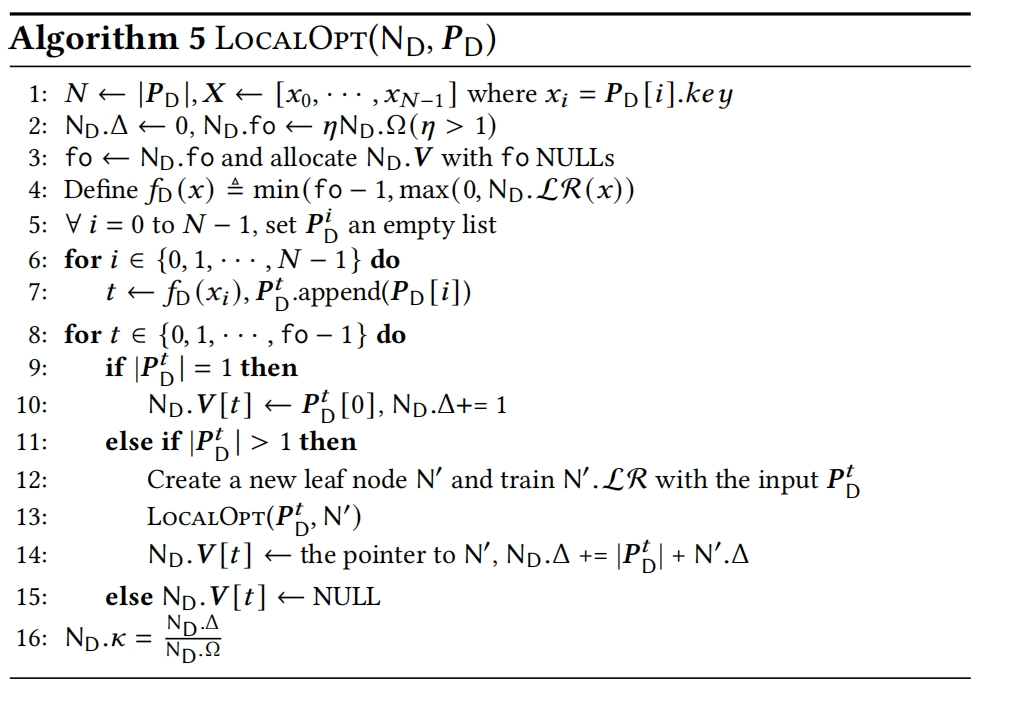
5. LOCAL OPTIMIZATION OF DILI
6. DATA UPDATES IN DILI
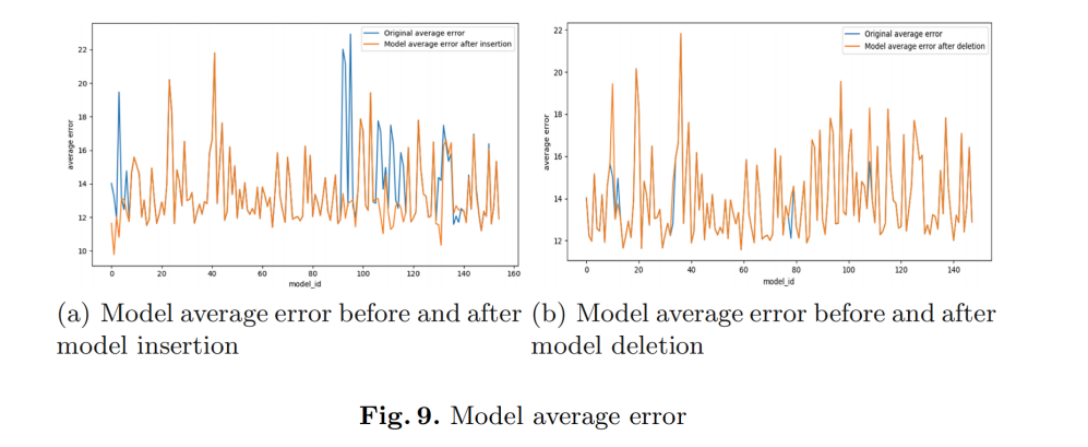
6.1 Insertions
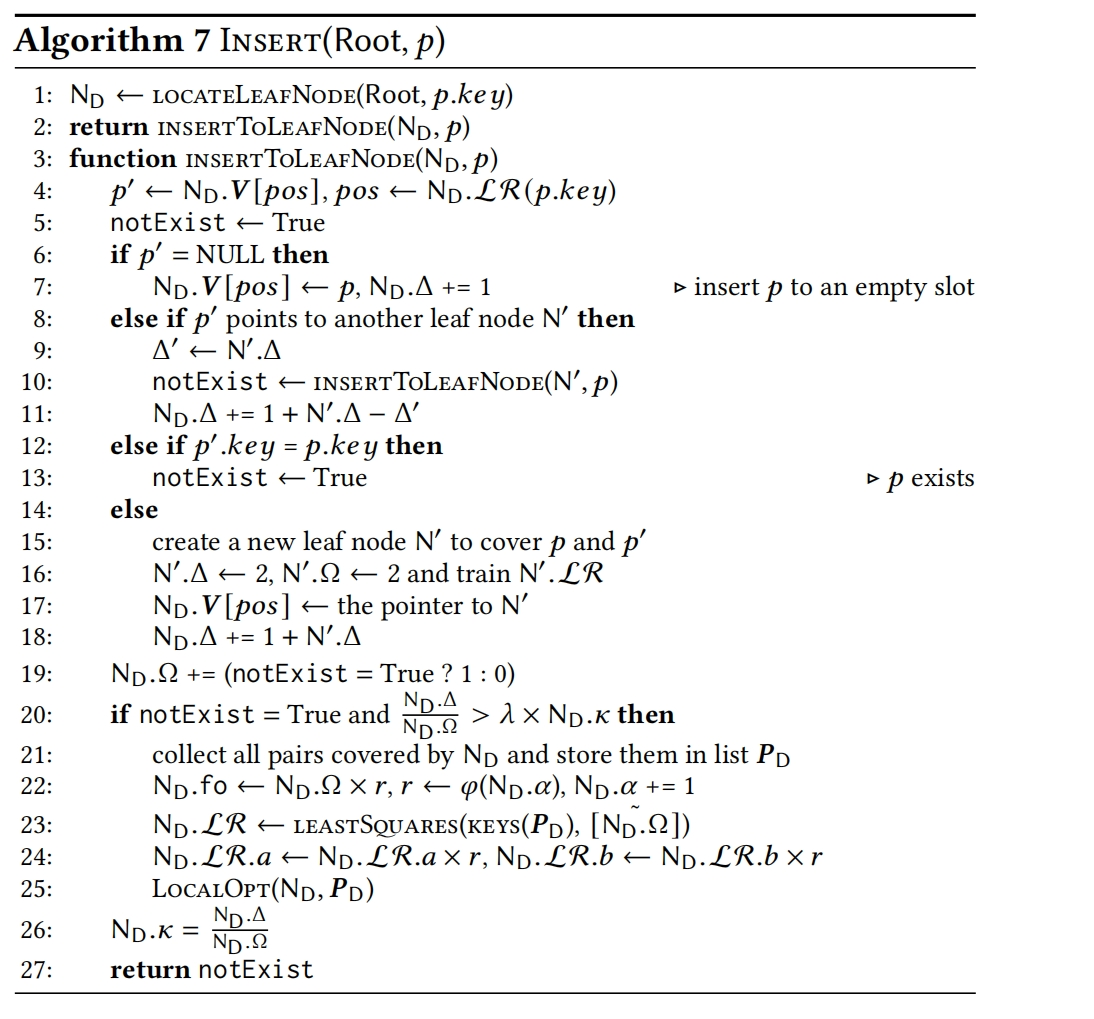
P exists标注的地方错误 应设置为notExist <— False
6.2 Deletions

7.EXPERIMENTAL STUDIES
7.1 Experimental Settings
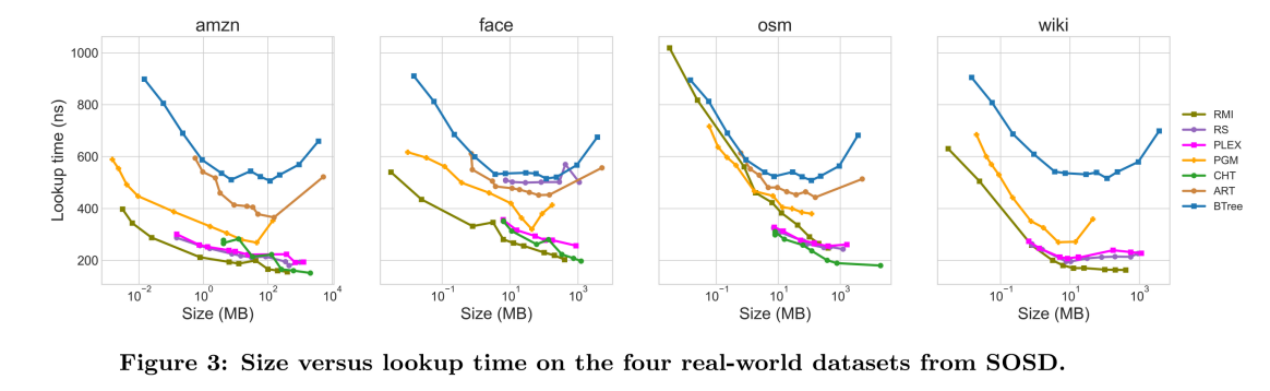
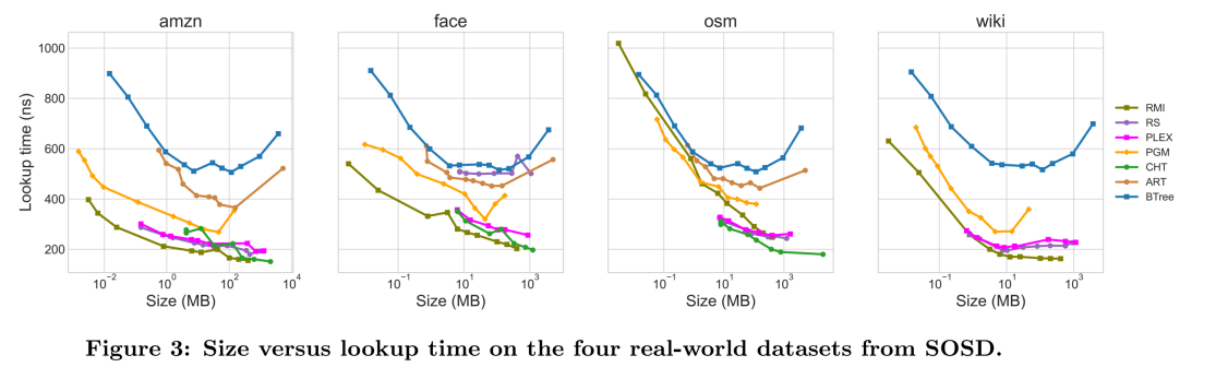
数据集:使用了SOSD benchmark中的4个真实数据集 和 1 个合成数据集
- FB : 200M Facebook 用户id
- WikiTS : 200M 维基百科网站日志条目的唯一请求时间戳
- OSM : 800M OpenStreetMap单元格的id
- Books : 800M Amazon的books的id
- Logn : 200M 从重尾采样的独特值 N(0, 1) 的对数正态分布
比较的baselines:
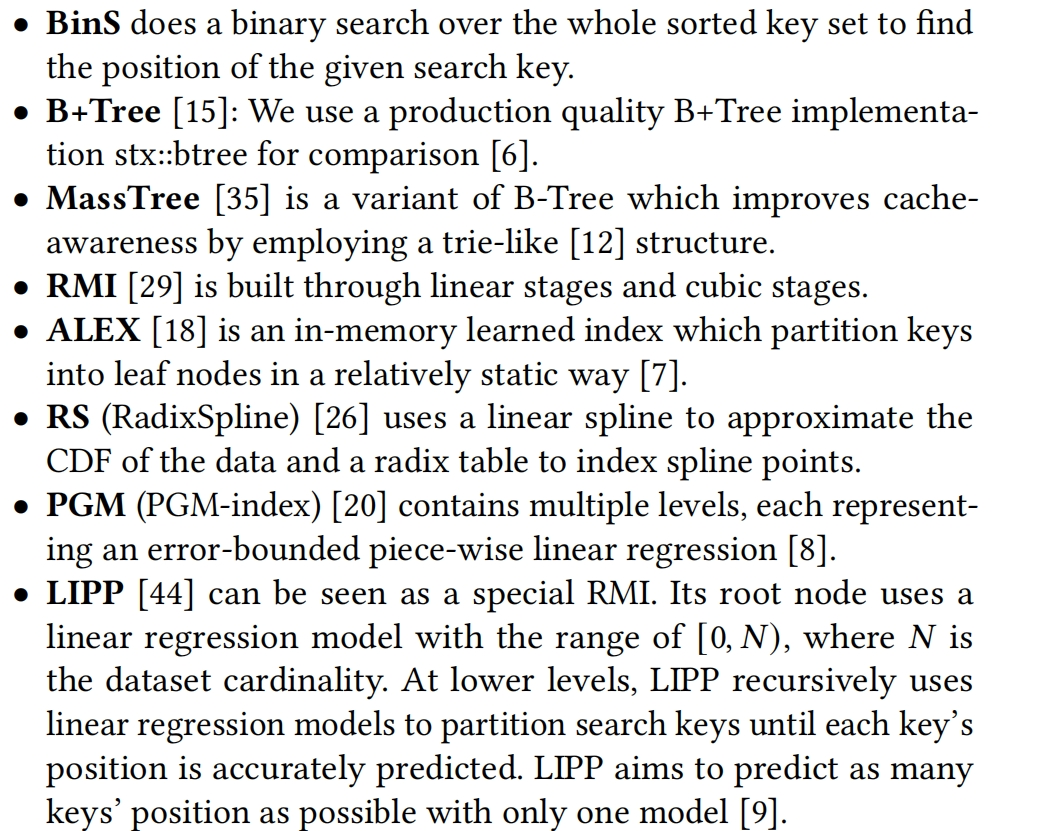
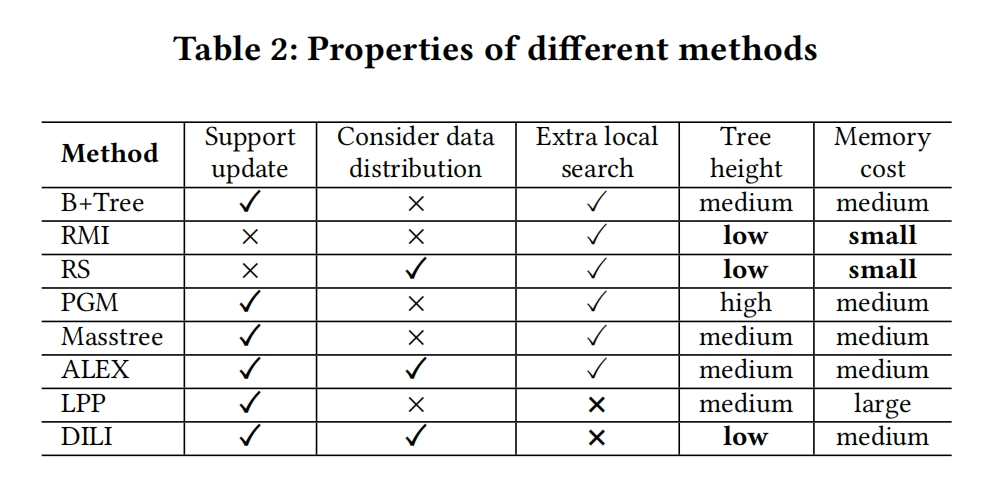
Table 2 总结了所有index的属性特点,更好的表现被加粗了
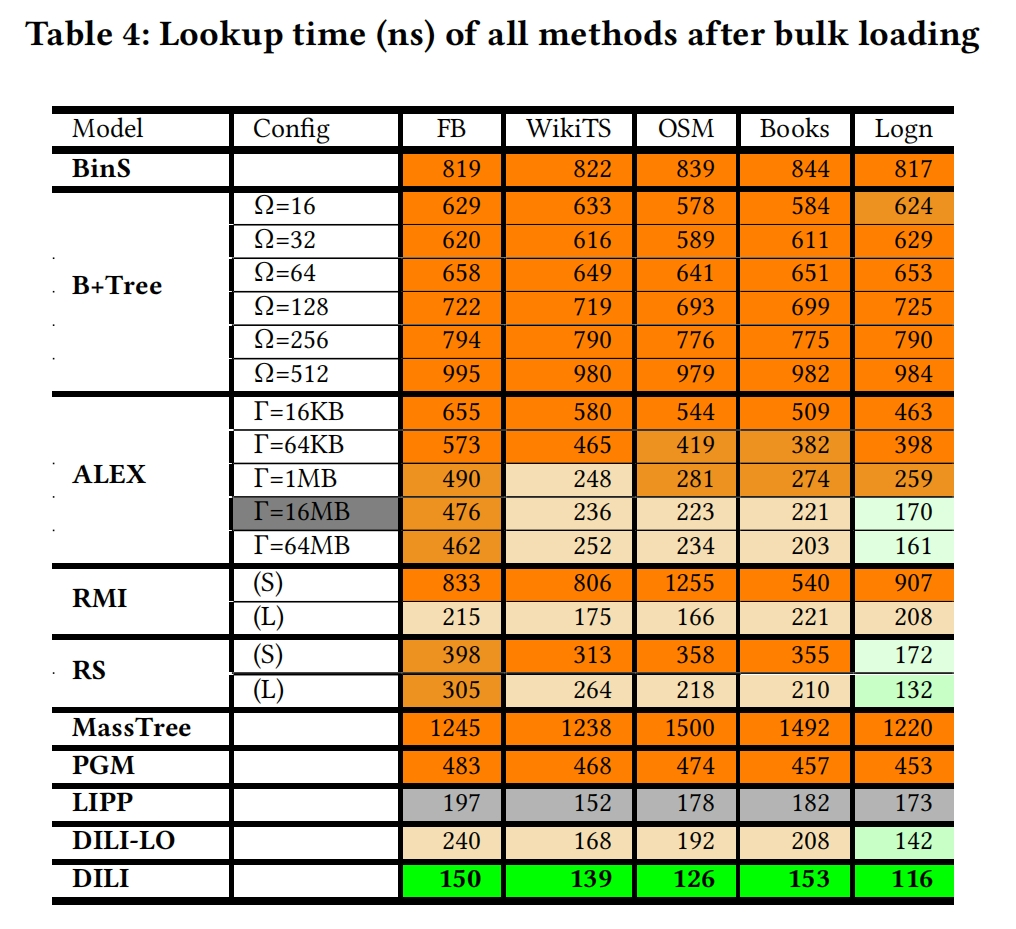
Evaluation Metrics :
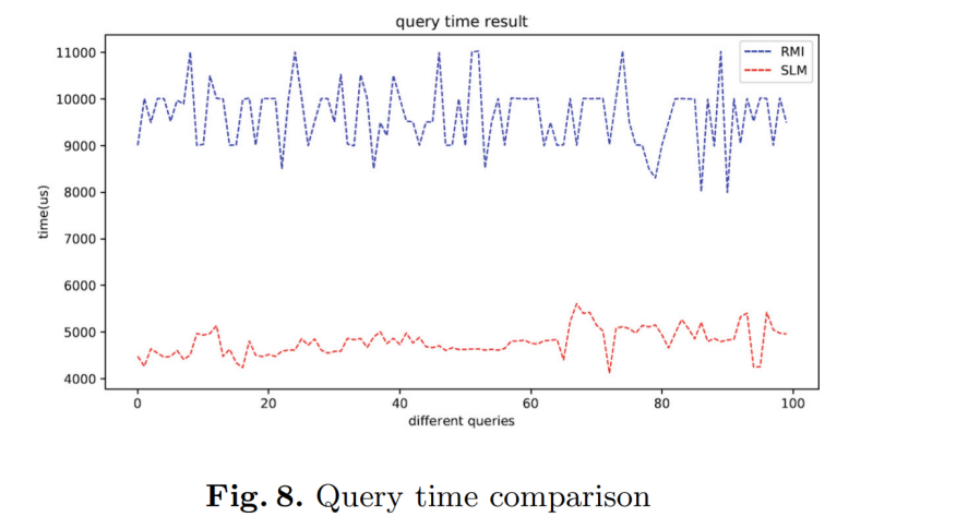
Lookup —> 平均每次query所用的时间
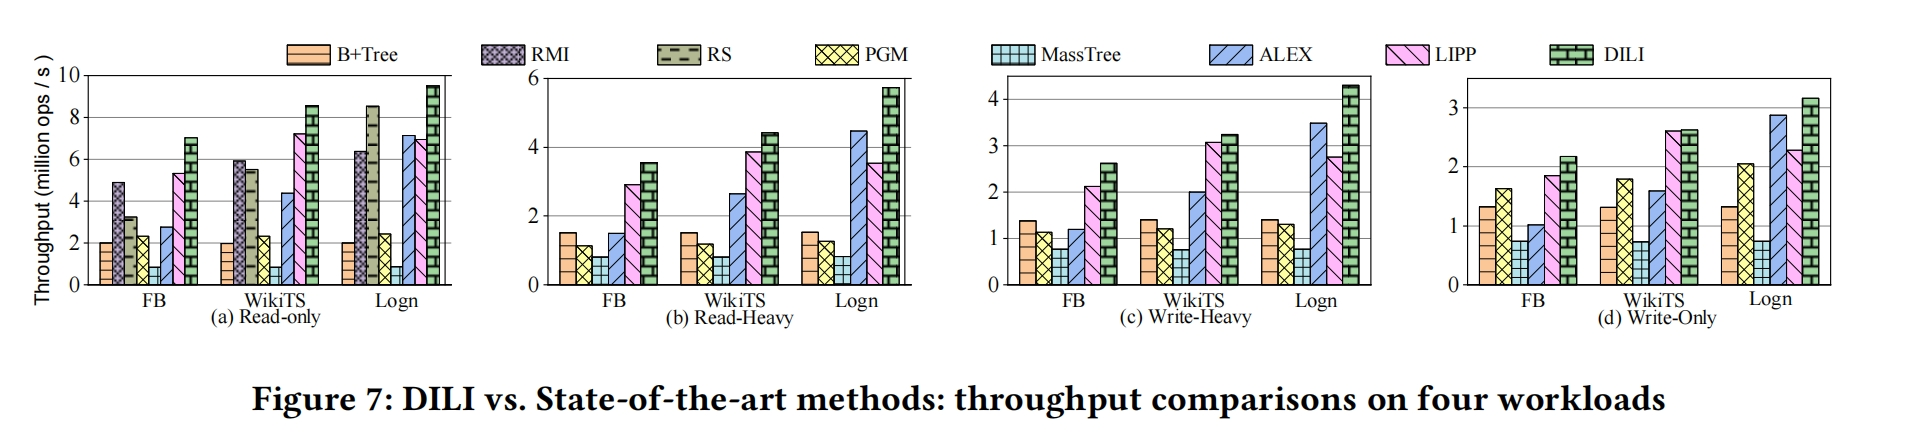
Throughtput —> 平均每second执行的operations的次数(query、insertion、deletion)
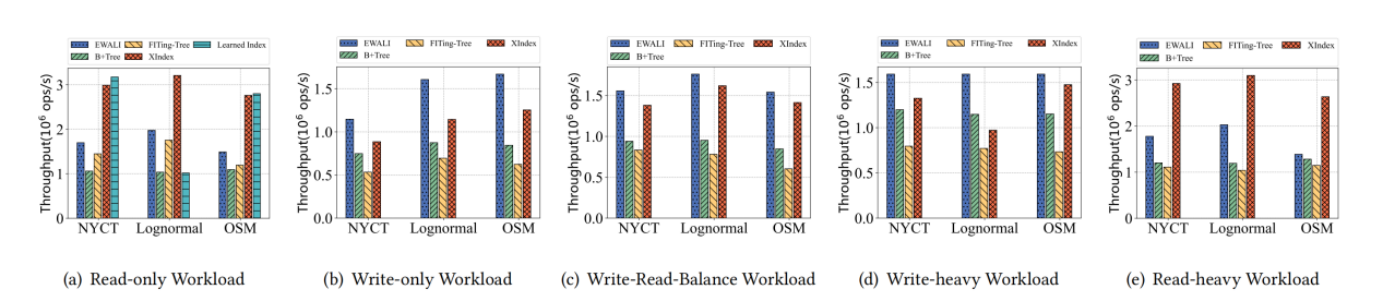
(1)The Read-only workload: 100M point queries
(2)The Read-Heavy workload: 50M insertions and 100M point queries
(3)The Write-Heavy workload: 100M insertions and 50M point queries
(4)The Write-only workload: 100M insertions
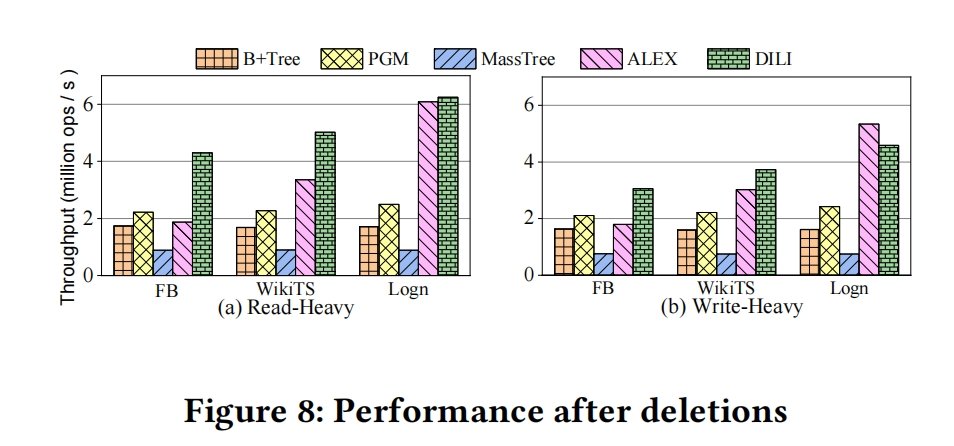
7.4 Effect of Many Deletions
(1)Read-Heavy workload : 100M lookups and 50M deletions
DILI achieves up to 3.6X, 2.3X, 7.0X and 2.3X higher throughput than B+ Tree,PGM,MassTree and ALEX,respectively.
(2)Deletion-Heavy workload : 100M deletions and 50M lookups
Only ALEX performs a little better than DILI on Logn dataset